Build a Cardboard Castle For Cats Your Feline Will Love 👑

A cardboard castle isn't just a craft project—it's a DIY enrichment fortress built from everyday boxes, just waiting for your little monarch! It’s designed to give your feline ruler a safe, fun space for hiding, climbing, and plotting world domination. 😼 It taps right into their natural instincts, giving them a purr-fect blend of entertainment and security without costing a fortune. Our mascot, Floofie, says it's the best real estate investment a hooman can make!
Why Your Cat Actually Needs a Cardboard Castle
You know that thing cats do? The second an empty box hits the floor, they’re in it. If I fits, I sits! That’s not just some weird, cute quirk—it’s pure, unadulterated instinct! Building a cardboard castle is more than just a way to kill a Sunday afternoon; it’s how you speak your cat's language and give them exactly what they crave. 💖
Our official mascot and Head of Quality Control, Floofie, insists it’s the best real estate investment you can make. 😉 This little DIY adventure caters directly to the wildcat ancestor still lurking inside your fluffy house panther. Giving them a fortress of solitude fulfills several key feline needs, turning a simple stack of boxes into a throne room fit for royalty.
Tapping into Primal Instincts
Cats are natural predators, sure, but they’re also small enough to be prey. This dual role means they are hardwired to seek out small, enclosed spaces where they can hide, observe their kingdom, and feel safe from any potential threats (like the vacuum cleaner monster 👹).
A cardboard castle offers the ultimate vantage point. From the safety of a turret or a little cutout window, your cat can survey everything—your living room, the kitchen, the dog—without feeling exposed. It's their personal command center for supervising their humans and planning their next nap. 😴
Floofie's Royal Decree: "A good fortress isn't just for hiding; it's for ruling! The best castles have high towers for snoozing and windows for judging the hoomans. It's all about strategic comfort, darling." 🐾
More Than Just a Box
Beyond safety, a castle provides critical enrichment that keeps your cat mentally sharp and physically active. Think of it as a feline jungle gym. The different levels encourage climbing and jumping, while the texture of cardboard is absolutely irresistible for scratching and chewing—which might just save your sofa from certain doom! 😅
This project also fits right into the modern trend of treating our pets like the family they are. Cardboard castles are an eco-friendly, recyclable way to offer sustainable luxury for your kitty. It's a booming market, too, with North America leading in cat furniture products valued at USD 1,450.75 million. You can learn more about the rise of cat furniture on futuremarketreport.com.
Ultimately, building a cardboard castle is an act of love that provides:
- A Safe Haven: A personal space to retreat to when they feel stressed or overwhelmed.
- Mental Stimulation: New textures, smells, and layouts to explore, which keeps boredom at bay.
- Furniture Protection: A designated (and highly desirable) spot for them to sink their claws into.
- Endless Fun: A playground for zoomies, ambushes, and epic royal battles with their favorite FloofChonk toys.
Gathering Your Castle Construction Supplies
Before you can build a cardboard castle worthy of your furry overlord, you need to assemble your royal construction materials! 👑 Think of this as your quest for the Holy Grail... of cardboard. Getting the right supplies is the difference between a majestic fortress and a floppy hut that gets flattened after one good zoomie session.
Our mascot, Floofie, is a real stickler for quality control, so he insists we start with the absolute best foundation. He's seen it all—from flimsy cereal boxes to glorious, multi-level fortresses built from appliance packaging. The choice of materials will define your castle's strength and, most importantly, its safety.
The Heart of the Castle: Cardboard Boxes
Not all cardboard is created equal in the eyes of a cat architect. You're looking for sturdy, clean boxes free of weird smells, stains, or excessive ink. Your cat will be sniffing, scratching, and snoozing in here, so a pristine canvas is a must! ✨
For the foundation of your magnificent feline fortress, you might consider sourcing the primary building material efficiently by exploring options for wholesale corrugated boxes. But for most of us, treasure can be found closer to home.
Here’s where to look for the best boxes:
- Appliance Stores: The holy grail! Refrigerator and washing machine boxes are made of thick, double-walled cardboard, perfect for a super-sturdy, multi-level cardboard castle.
- Furniture Stores: These often have large, clean boxes that are ideal for creating spacious main halls and towers.
- Your Own Deliveries: Those large online orders can finally pay off! Just make sure to remove all the plastic tape and shipping labels first.
Floofie’s Official Decree: "Always perform the 'chonk check' on your cardboard. If it can withstand a mighty pounce from a well-fed floof, it has my royal seal of paw-proval!" 🐾
Your Royal Toolkit: Adhesives and Cutters
Once you have your cardboard, it’s time to gather the tools that will bring your vision to life. Safety is the name of the game here. Every single item you use should be non-toxic and pet-safe. Cats love to chew, and we want to make sure their curious nibbles are harmless. 😇
A sturdy utility knife or a box cutter with a fresh blade will make cutting clean lines for windows and doors a breeze. Remember to always cut away from yourself on a protected surface! For adhesives, skip the craft glue and go straight for the good stuff. A high-quality, non-toxic hot glue gun is your best friend for creating strong, instant bonds between walls and turrets.
Your Royal Building Supplies Checklist
To make things easy, here’s a quick breakdown of the essentials and some fun extras. Getting this part right sets you up for a smooth—and safe—building process.
| Material | Best For | Floofie's Pro-Tip ✅ | Safety Note ⚠️ |
|---|---|---|---|
| Double-Walled Cardboard | The main structure and weight-bearing floors. | Ask local stores if they have spare appliance boxes they're getting rid of! | Always remove all staples, plastic tape, and shipping labels before you start. |
| Non-Toxic Hot Glue | Quickly and securely bonding walls, towers, and reinforcements. | Use generously on all interior seams to create a fortress that can handle epic zoomies. | Avoid standard craft glues that may contain chemicals harmful if ingested. |
| Utility Knife/Box Cutter | Cutting precise doorways, windows, and decorative battlements. | A sharp blade is safer than a dull one! It prevents slipping and ragged edges. | Keep tools safely out of paw's reach and always supervise your furry helper. |
| Ruler or Straight Edge | Ensuring your castle walls are straight and your towers don't lean! | A metal yardstick is perfect for guiding your cuts and measuring long sections. | A wobbly castle is an unsafe castle. Measure twice, cut once! |
With your supplies gathered, you're one step closer to building the cardboard kingdom of your cat's dreams.
If you’re feeling inspired by this project, you can also check out our guide on other awesome DIY cardboard cat furniture to expand your kitty's kingdom! 🏰
Assembling Your Castle's Main Structure
Alright, future feline architects, it's time to raise the royal walls! With your supplies gathered, we can now transform that pile of cardboard into a magnificent fortress. This is where the real fun begins—cutting, connecting, and creating a cardboard castle for cats that will make your furry overlord puff up with pride. 🏰
Our head of quality control, Floofie, reminds us that a good castle isn't just about looks; it's about structural integrity! We're not just taping boxes together. We're engineering a palace strong enough to withstand surprise ambushes and ferocious 3 a.m. zoomies. Let's get building! 🛠️
Before you start cutting and gluing, it helps to visualize the process from supplies to a solid structure.
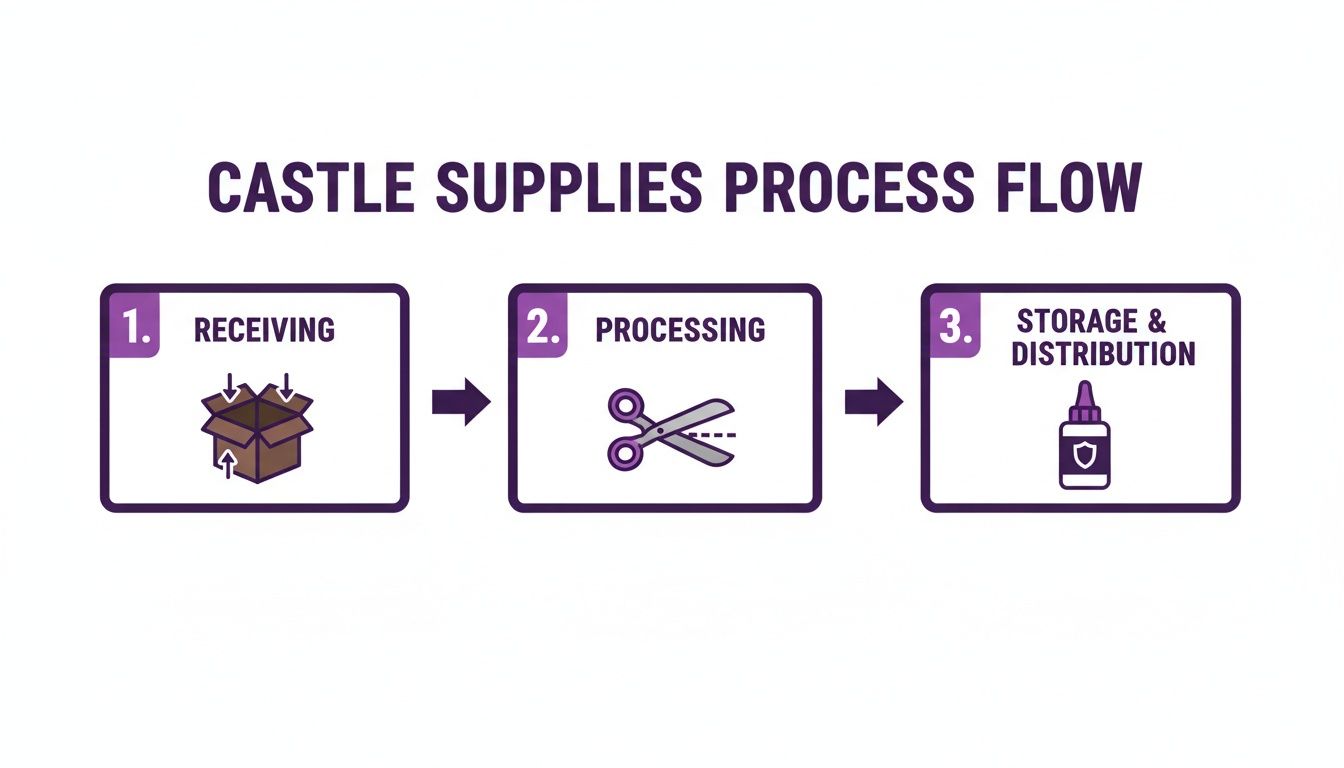
This simple flow—from sturdy boxes to the right tools and safe adhesives—is the foundation for a successful and cat-safe build.
Laying the Royal Foundation
Every grand castle needs a solid base. A wobbly fortress is a total no-go for any self-respecting feline monarch. The best way to achieve this is by starting with your largest, thickest box on the bottom floor.
Think about a real-world scenario: if you have a particularly chonky cat who loves to leap from great heights, a narrow, tall tower is just a recipe for a royal tumble. Instead, aim for a wider, more pyramid-like structure. A base that is wider than the upper levels creates a lower center of gravity, making the entire castle far more stable.
To add some serious heft, you can create a false bottom. Just cut an extra piece of cardboard to fit snugly inside the base level and glue it down. This double-layered floor adds excellent reinforcement right where it's needed most. It's a small trick that makes a huge difference! 💪
Carving Out Doors and Windows
Now, let's create some majestic entryways and lookout points! Doors and windows aren't just for decoration; they provide crucial ventilation and give your cat multiple escape routes—a must-have for feeling secure. Remember to size them appropriately for your royal resident.
- Doorway Design: A good rule of thumb is a main entrance about 6-7 inches wide and tall. For larger breeds like a Maine Coon, you might want to go up to 8 inches. An arched doorway adds a nice touch of regal flair! ⚜️
- Window Placement: Don't just cut random holes. Think strategically! A small "spy hole" near the bottom lets them watch your feet, while a larger window on an upper level gives them a perfect perch to survey their kingdom.
Floofie's Architectural Tip: "Hoomans, listen up! We cats need options. Multiple doors prevent ambushes from pesky siblings (or the dog). And windows? They're for judging you. Don't skimp on the judgment windows." 👀
When cutting, always use a sharp utility knife and a straight edge for clean, crisp lines. Ragged edges can look messy and might even tempt your cat to chew on them more. Be sure to place a scrap piece of cardboard underneath your cutting area to protect your floors.
Connecting the Levels Like a Pro
A multi-story castle is the ultimate status symbol in the feline world. Connecting different levels safely is absolutely key. You can create interior passages or even exterior ramps for a more dramatic look.
To connect floors vertically, place your second-level box on top of the first and trace an opening. Then, cut a hole about an inch smaller than your tracing in both boxes. This creates an overlapping lip that you can generously apply hot glue to for a super-strong bond.
For a more playful castle, consider adding ramps.
- Cut a long, wide strip of cardboard (at least 8 inches wide).
- Gently score lines across the width of the ramp, about one inch apart. This lets it bend without breaking.
- Glue smaller strips of cardboard horizontally across the ramp to act as "rungs" for better grip.
- Securely attach the ramp to a lower doorway and an upper platform with plenty of non-toxic hot glue.
This kind of project can really spark your creative side! If you love getting your hands dirty with fun projects, you might also find some inspiration in these other DIY ideas for your home.
Reinforcing for Maximum Zoomie-Proofing
The final and most critical part of assembling the main structure is reinforcement. This is what separates a temporary shack from a permanent palace. Your cat will be jumping, pouncing, and scratching this creation, so it needs to be ready for battle.
Go back through your structure and add extra support wherever you see a potential weak spot. Interior corners are a great place to add triangular cardboard braces. You can also double-up the walls of high-traffic areas or popular perches by gluing another layer of cardboard inside.
And if you want to take your building skills to the next level after this project, we have more ideas. Check out our guide on how to make an even bigger DIY cardboard cat tower for more advanced designs. A sturdy castle is a happy castle, and your cat will thank you with endless head boops and purrs. 💖
Decking Out the Royal Palace: Decorations & Fun!
Your cat's cardboard castle is standing tall and proud, but a bare fortress isn't quite fit for royalty, is it? Now comes the best part—decorating! This isn't just about making it look cute for your Instagram feed (though that's a huge bonus 🎨); it's about adding functional flair that turns a simple box into an interactive paradise.
Our royal mascot, Floofie, is a firm believer that every castle should be a multi-purpose palace for playing, snoozing, and scratching. With a few simple, cat-safe additions, you can create a space that’s as enriching as it is enchanting. Let's make this castle a true home! 💖
Creating the Royal Chambers
Every king or queen needs a ridiculously comfy spot to nap after a long, hard day of ruling the living room. Making the interior cozy is your first step to earning that royal seal of paw-proval. Soft textures that hold your cat’s scent will make the new castle feel safe and familiar.
Floofie likes to turn one of the lower levels into the official "Throne Room" or "Snooze Chamber." Just toss in a small, soft blanket or even an old t-shirt that smells like you. Cats are drawn to familiar scents, and this little trick works wonders to encourage a hesitant cat to start exploring their new digs.
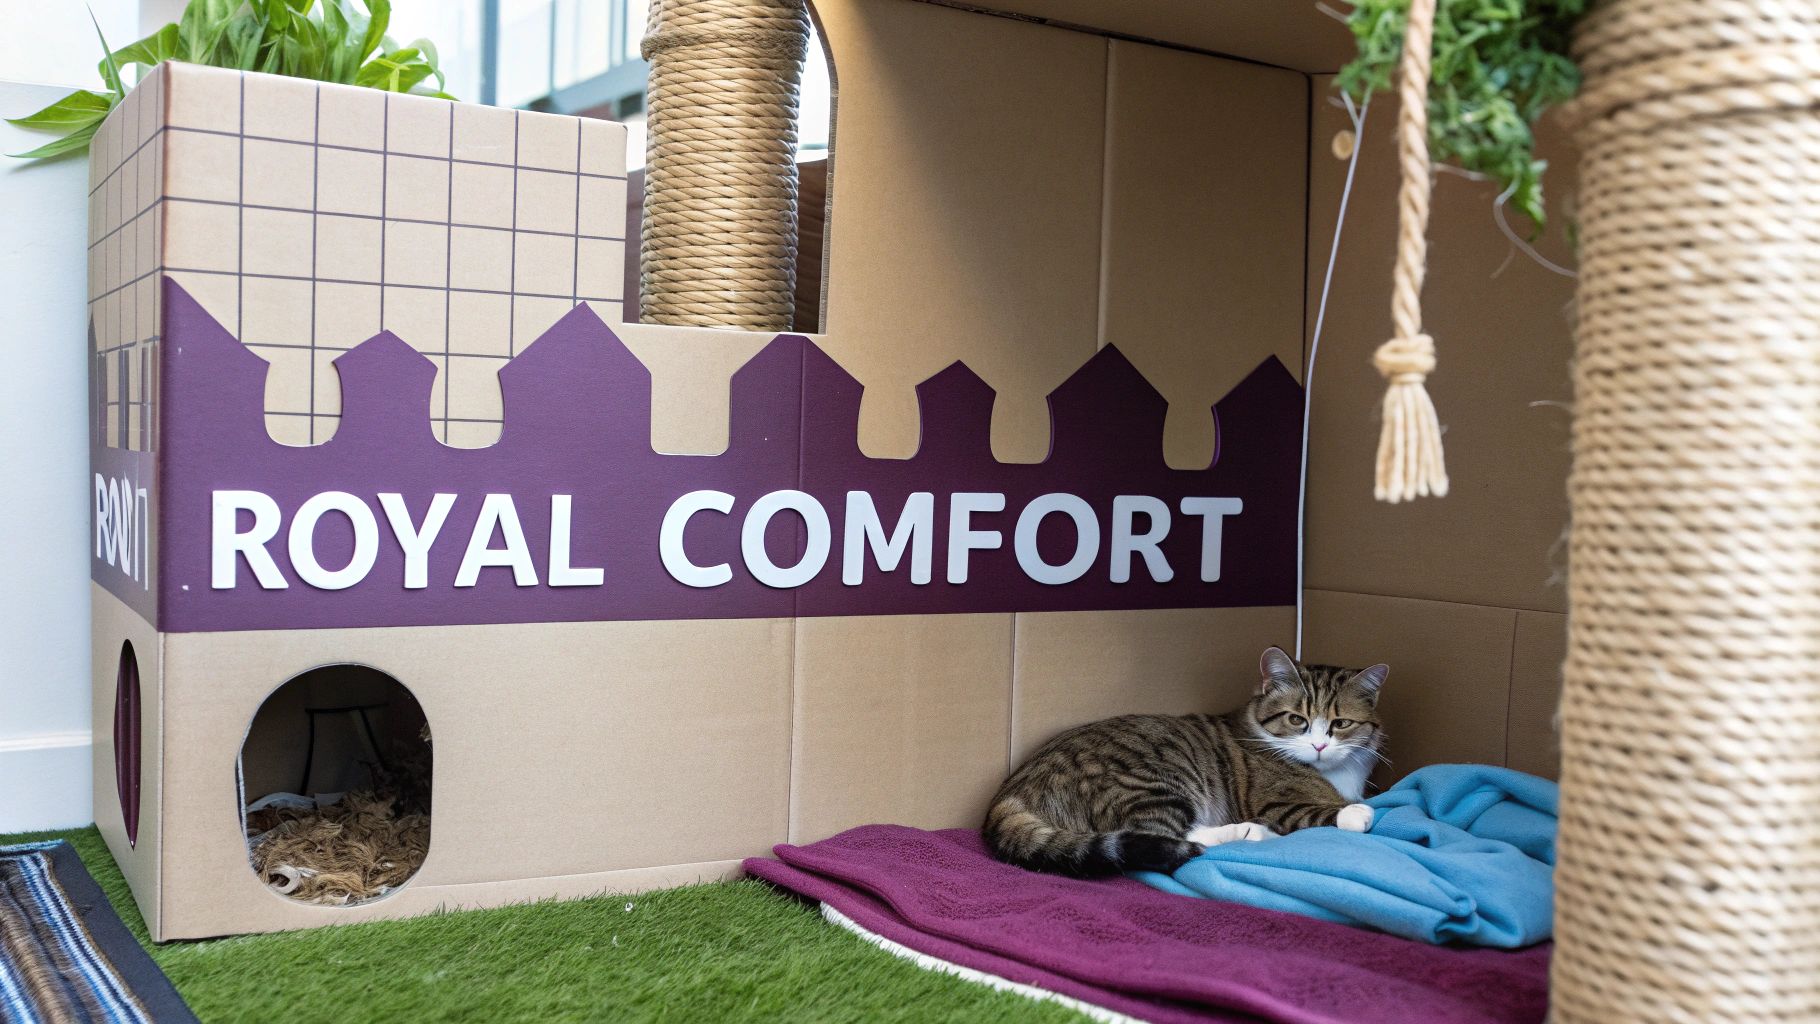
Adding Built-In Scratching Posts
Why have a castle if you can't sharpen your royal claws on it? Integrating scratching surfaces is a brilliant way to save your furniture while satisfying your cat’s natural urge to scratch. This is one of Floofie’s absolute favorite castle upgrades! 😻
You can easily attach scratching materials to the interior or exterior walls of your cardboard castle. Here’s how Floofie's hoomans do it:
- Sisal Rope: Tightly wrap a small, flat piece of cardboard with sisal rope, securing the ends with non-toxic hot glue. Then, glue the whole panel right onto a sturdy wall of the castle.
- Corrugated Scratch Pads: Grab a flat, corrugated cardboard scratcher refill. Use a generous amount of hot glue to mount it vertically or horizontally onto a wall.
This functional decoration gives your cat a designated place to stretch and maintain their claws, turning a simple wall into a very satisfying manicure station. 💅
Floofie’s Royal Decree: "A fortress without a proper scratching post is merely a box. My subjects demand the finest scratching surfaces for their murder mittens. Do not disappoint your ruler!"
Installing a Playful Drawbridge and Toys
A castle needs a bit of drama and excitement! Adding interactive elements will keep your kitty engaged and entertained for hours. A "drawbridge" is a fun, thematic way to hang a toy right at the entrance.
To create one, just punch two small holes above a main doorway. Thread a sturdy rope or a thick shoelace through the holes and attach a lightweight toy—like our popular FloofChonk Feather Wand—to the end so it dangles just inside the entrance. Your cat will have to bat at the "gatekeeper" to enter their fortress!
You can also place a battery-operated toy, like our amazing FloofChonk UFO Cat Toy, in the "courtyard" or a larger lower room. This creates an irresistible zone of automated fun that encourages them to spend more time in their new palace. For even more ways to keep your cat mentally stimulated, check out our guide on other awesome cat enrichment ideas.
Safety First Purr-incess
While you’re unleashing your creativity, always keep safety at the forefront. Every single decorative item you add should be 100% cat-safe.
- Avoid Small, Dangly Bits: Steer clear of small beads, buttons, or sequins that could be chewed off and swallowed. It's just not worth the risk.
- Use Non-Toxic Materials: Make sure any paint, markers, or glue you use are certified non-toxic. Crayons made from soy or beeswax are a great option for adding color safely!
- No Loose Strings: While hanging toys are fun, avoid long, thin strings or ribbons that could pose a strangulation risk. Always use thick, sturdy rope and supervise playtime.
By focusing on both fun and function, you can deck out a cardboard castle that’s not just an adorable photo op but a truly valuable enrichment tool for your furry best friend. Happy decorating! ✨
The Royal Unveiling and Long-Term Care
You've done it! Your incredible cardboard castle is built, decorated, and officially ready for its royal resident. 👑 But before the coronation, you need to plan the grand opening. You can't just plop it down and expect your discerning kitty to move in—this requires a bit of feline-focused fanfare.
Our own CEO (Cat Executive Officer), Floofie, will be the first to tell you that first impressions are everything. Cats are naturally cautious about new items in their territory, so making the castle feel safe and inviting right away is the secret to a successful housewarming. Let's make this an event they can't resist! 🎉
The Grand Introduction: A Floofie-Approved Welcome
The goal here is to create a powerful, positive association with the new castle. Don't think of it as furniture; think of it as a five-star resort you need to sell them on. It's all about making them believe exploring it was their idea all along. 😉
Here are a few tactics that work like a charm to lure your kitty into their new kingdom:
- The Treat Trail: It's an old trick for a reason! Create a small path of their absolute favorite treats leading right up to the front gate, then place a jackpot reward just inside.
- The Catnip Welcome Mat: A little sprinkle of catnip near an entrance can make the castle smell incredibly appealing, encouraging them to investigate and maybe even do a celebratory roll.
- The Playful Procession: Grab their go-to wand toy, like our amazing FloofChonk Feather Wand, and lead them on a chase that weaves in and out of the castle doorways. Play is a fantastic way to build their confidence in a new space!
Floofie’s Royal Decree: "A hooman must never force a monarch onto their throne. Entice me with snacks, woo me with toys, and make me believe I discovered this glorious palace all on my own. It's just proper royal etiquette." 🐾
Keeping the Kingdom in Tip-Top Shape
Your job as the castle keeper doesn't stop once your cat moves in. A well-loved cardboard castle is going to see plenty of action, from epic naps to ferocious playtime attacks. A little regular maintenance will keep it a safe and clean hangout for your furry ruler.
Think of it as routine palace upkeep. A quick weekly check-up can seriously extend the life of your creation and keep your cat healthy and happy.
Routine Castle Maintenance Checklist
Keeping the fortress clean is pretty straightforward. For everyday tidying, a handheld vacuum is your best friend for sucking up stray fur and kitty crumbs from all the nooks and crannies. If a small spill happens, just use a slightly damp cloth to spot-clean, but try not to soak the cardboard—that'll weaken the structure.
Here’s a quick guide for long-term care:
- Spotting Wear and Tear: Once a week, give the castle a quick once-over. Check for any sagging floors, heavily shredded walls that look a bit wobbly, or any decorative bits that might have come loose.
- Making Royal Renovations: One of the best things about a DIY castle is how easy it is to repair! If a wall gets too shredded for your liking, just cut that section out and glue in a fresh cardboard "stone." You can also reinforce shaky turrets with some extra internal braces.
- Knowing When to Abdicate: Let's be real—no cardboard castle lasts forever. If the structure becomes wobbly beyond repair, starts to develop a musty smell, or is visibly soiled, it's time to decommission the fortress and start planning the next one. After all, the joy is in the creation!
Follow these simple care tips, and your cat's cardboard castle will remain a beloved and safe retreat for months to come. Happy ruling! ✨
Common Questions from Castle Builders
Building a cardboard kingdom for your furry overlord is a noble pursuit, but hey, even the best architects have questions. Don't worry, you’re not alone! Our mascot, Floofie, has been overseeing these projects for years and has rounded up the most common queries from builders just like you.
Let's get them answered so you can create the safest, sturdiest, and most beloved cardboard castle for cats on the block. 🧐
Is It Safe for My Cat to Chew on the Cardboard?
This is the number one question we get, and for good reason! Mostly, the answer is yes. Cats often shred or nibble on cardboard as a form of play or to file their claws, and they usually spit out the pieces rather than swallowing them. The key is using plain, untreated cardboard without shiny coatings, excessive ink, or plastic tape.
Before you start construction, do a thorough check to remove any stray staples, bits of glue, or plastic. During their first few play sessions in the new castle, just keep an eye on your little monarch. If they seem more interested in eating the cardboard than just shredding it, it's a good idea to redirect their attention with a dedicated chew toy.
How Do I Make the Castle Sturdy Enough for a Big Cat?
Building a fortress fit for a majestic Maine Coon or a particularly chonky ruler requires some smart engineering. A flimsy castle is no fun for anyone, and it can be a safety hazard. The secret really lies in a strong foundation and strategic reinforcement.
To build for a bigger cat, follow these Floofie-approved tips:
- Start with Strong Materials: Always opt for thick, double-walled cardboard. Think refrigerator or washing machine boxes—they're built to withstand some serious weight.
- Widen the Base: A wider, almost pyramid-like structure is always more stable than a tall, narrow tower. This lowers the center of gravity and prevents tipping during those epic pounces.
- Reinforce Key Areas: Add extra strips of cardboard and non-toxic glue to all interior corners and seams. You can even place a heavy book or a flat weight on the bottom floor, hidden under a cozy blanket, for ultimate stability.
When Should I Replace My Cat's Cardboard Castle?
Honestly, the lifespan of your glorious cardboard creation depends entirely on your cat's level of destructive enthusiasm! A well-loved fortress can last anywhere from a few months to over a year. It's not about a date on the calendar but about observing its condition.
Just keep an eye out for sagging walls, heavily shredded areas that compromise the structure, or if it's getting a bit too grimy to clean effectively.
Floofie’s Royal Maintenance Tip: "A castle's glory is not eternal, hooman. When my battlements begin to droop or the royal chambers smell less-than-fresh, it is time for a royal renovation. A king must maintain his standards!" 🧐
One of the best parts about a DIY castle is that you can often just replace a single damaged section instead of rebuilding the entire thing from scratch.
My Cat Is Ignoring the Castle. What Should I Do?
First off, don't take it personally! Cats are creatures of habit and are often suspicious of anything new in their territory. Your cat isn't snubbing your hard work; they're just being cautious. Patience and positive reinforcement are your best tools here.
Start by placing the castle in an area of your home where they already love to hang out—near a sunny window or in a quiet corner of the living room. Then, make it irresistible. Lure them in with a trail of treats, sprinkle a bit of catnip inside, or tuck a favorite blanket that already smells like them into one of the rooms.
Try playing with a wand toy, like our awesome FloofChonk Feather Wand, leading them in and out of the doorways to show them it's a fun, safe space. Let them explore on their own terms, and soon enough, they'll claim their throne.
We hope this helps you on your castle-building journey! For more cat-approved toys and accessories to decorate your new fortress, check out the amazing collection at FloofChonk. You'll find everything you need to make your cat feel like true royalty. Explore the FloofChonk collection today! 😻