How to make cat wall shelves: Easy, safe, stylish cat perch ideas

At its core, making cat wall shelves is pretty simple. You pick a sturdy wood like pine, cut it to size, sand it smooth, and mount it securely to the wall with strong brackets screwed right into the studs. But what you're really doing is creating a vertical playground that speaks directly to your cat's wild instincts. 😻
Let's get into why this project is such a game-changer for your furry overlord.
Why Your Cat Craves a Vertical Kingdom
Ever spotted your cat scaling the back of your sofa or making a heart-stopping leap onto the kitchen cabinets? That isn't just mischief—it's pure instinct. Our feline friends are hardwired with a deep-seated need for vertical territory.
In the wild, height means safety. It’s the ultimate lookout spot for spotting prey (or the mail carrier) and getting a strategic advantage over their surroundings.
When you learn how to make cat wall shelves, you’re not just adding some new furniture. You’re building a "cat superhighway" that taps directly into their wild roots. Our mascot, Floofie, is already practicing his parkour moves just thinking about it! 😼
This vertical world, or "catscape," gives them an essential outlet for physical and mental stimulation, turning boring old walls into an exciting playground.
The Perks of Perching
Giving your cat an elevated space does more than just satisfy their inner lion. It brings a whole host of benefits that lead to a happier, healthier companion. It's about giving them a kingdom to rule from on high.
Here are a few reasons why a vertical world is non-negotiable for a content cat:
- Confidence Booster: A high, safe perch to retreat to can make a timid cat feel much more secure. They can observe the household chaos from a comfortable distance without feeling threatened.
- Stress Reduction: In multi-cat homes, vertical spaces are a secret weapon for conflict resolution. It expands their territory, cutting down on competition and squabbles over the best napping spots.
- Exercise and Enrichment: A well-designed shelf layout encourages jumping, climbing, and exploring. This keeps your cat physically active and mentally engaged, which helps prevent those boredom-induced antics we all know so well.
The trend of creating these enriched environments for our pets has absolutely exploded. The global market for wall-mounted cat shelves has soared, reaching a valuation of around USD 1.21 billion. This boom is fueled by awesome owners like you who want to give their pets the best living space possible. You can read more insights about the rise of cat-centric home design here.
Floofie's Takeaway: "A cat without a perch is like a king without a throne. It’s just not right! Building shelves is the ultimate act of worship for your furry overlord."
This guide will show you exactly how to design and build a custom catscape that your furry friend will adore—and that will blend beautifully with your decor. Let's get building! 🐾
Let's Get Your Cat Construction Materials Together
Okay, before we even think about making that first cut, we need to get our paws on all the right supplies. A solid, wobble-free cat wall shelf starts with the right toolkit and, most importantly, materials that are completely safe for your cat.
Think of this as your treasure map to building the ultimate feline superhighway. Having everything laid out and ready to go means less frantic searching for that one screw and more time for the fun part—the actual building!
The Ultimate Cat Shelf Shopping List
To make things super simple, here's a checklist of everything you'll need. Screenshot this, print it out, do whatever you gotta do—just make sure you have these essentials before you start.
| Category | Essential Items | Floofie's Pro-Tip ✨ |
|---|---|---|
| Wood & Structure | Untreated solid wood (pine, spruce) OR cabinet-grade plywood | Avoid particleboard/MDF. It's just not strong enough for a certified chonk! |
| Mounting Hardware | Heavy-duty L-shaped metal brackets | The bracket arm should be at least ⅔ the depth of your shelf. |
| Fasteners | Wood screws (long enough to go 1.5 inches into studs) | Don't skimp here. This is what keeps the shelf on the wall. |
| Essential Tools | Power drill, electronic stud finder from FloofChonk, level, tape measure | Your stud finder is your new best friend. Trust me. |
| Finishing Touches | Medium & fine grit sandpaper | For perfectly smooth, splinter-free edges your cat's paws will thank you for. |
| Comfort Toppings | Carpet remnants, sisal fabric, or plush faux fur | This adds grip for safe landings and a five-star lounging experience. |
Having this list ready will turn your hardware store trip from a chaotic scramble into a strategic mission. Now, let's break down a few of these key components.
Choosing Your Core Materials
The heart of any great cat shelf is, you guessed it, the shelf itself! The wood you pick needs to be strong enough to handle surprise zoomies and completely safe for those curious sniffers and occasional nibblers.
Here’s the rundown on the best wood for happy paws:
- Untreated Solid Wood: Pine and spruce are my go-to recommendations. They're affordable, incredibly sturdy, and—most importantly—they don't have any nasty chemicals that could harm your kitty.
- Cabinet-Grade Plywood: This isn't your grandpa's flimsy plywood. It’s a beast. It’s strong, resists warping, and gives you a super smooth finish that’s perfect for delicate toe beans.
- What to Avoid: Please, please steer clear of particleboard or MDF. They just can't hold the weight of a pouncing cat and often contain glues that are toxic if your cat decides to taste-test their new furniture.
This focus on creating better, safer, and more stylish options for our pets is a huge deal. The specialized cat furniture market has seen an incredible jump from an estimated USD 150 million valuation, with forecasts suggesting it could double to USD 300 million by 2033. This growth just shows how much we all see our cats as family members who deserve the absolute best. You can learn more about the booming cat furniture market and see for yourself.
The Unsung Heroes: Brackets and Hardware
Now, let's talk about what holds this whole operation together: the brackets. A shelf is only as strong as its support system, and this is one area where you absolutely cannot cut corners.
You'll want to look for heavy-duty, L-shaped metal brackets. Make sure the length of the bracket arm is at least two-thirds the depth of your shelf to give it maximum stability. So, for a 10-inch deep shelf, you’ll need brackets with an arm that's at least 7 inches long. It's simple physics!
Floofie's Safety PSA: "A wobbly shelf is a major party foul! 🙀 Always use screws that are long enough to go at least 1.5 inches into the wall studs. This ensures your shelf can handle even my most epic pounces!"
Don't Forget the Cozy Toppings
Last but not least, let's add the finishing touches that transform a simple plank of wood into a five-star cat lounge. Comfort is everything! Covering the shelves gives your cat much-needed grip for safe landings and a soft spot for those all-important naps.
Here are a few cozy ideas:
- Carpet Remnants: These are durable, offer excellent traction, and you can often find small off-cuts for next to nothing at local flooring stores.
- Sisal Fabric: It's the same stuff used on scratching posts! This is a fantastic two-for-one solution that’s super tough and satisfies your cat's natural urge to scratch.
- Plush Faux Fur: For the ultimate luxury lounger, you can't beat soft, snuggly faux fur. It looks incredibly chic and feels like heaven.
While a wooden shelf is a super rewarding project, maybe you're in the mood for a quicker craft. If you're feeling creative, you should totally check out our guide on how to create some fun and easy DIY cardboard cat furniture for some extra feline fun
Designing and Building Your Cat Superhighway
Alright, let's turn those vertical dreams into a whisker-twitching reality! This is where the fun really starts, bringing your cat's own personal superhighway to life. 🐾 We're going to dive into three awesome DIY cat shelf projects, perfect for every skill level—from "I've never even looked at a drill" to "I build furniture in my sleep."
First, we'll ease in with the sleek and simple Simple Floating Perch. Then, we'll level up to the more adventurous Tiered Cat Climb, creating a fun, staggered path up your wall. And for the ambitious DIY pros out there, we'll construct the magnificent Corner Lookout Lounge, giving your kitty a panoramic view of their kingdom.
Here’s a quick visual of the core materials you’ll want to gather before we get our hands dirty.
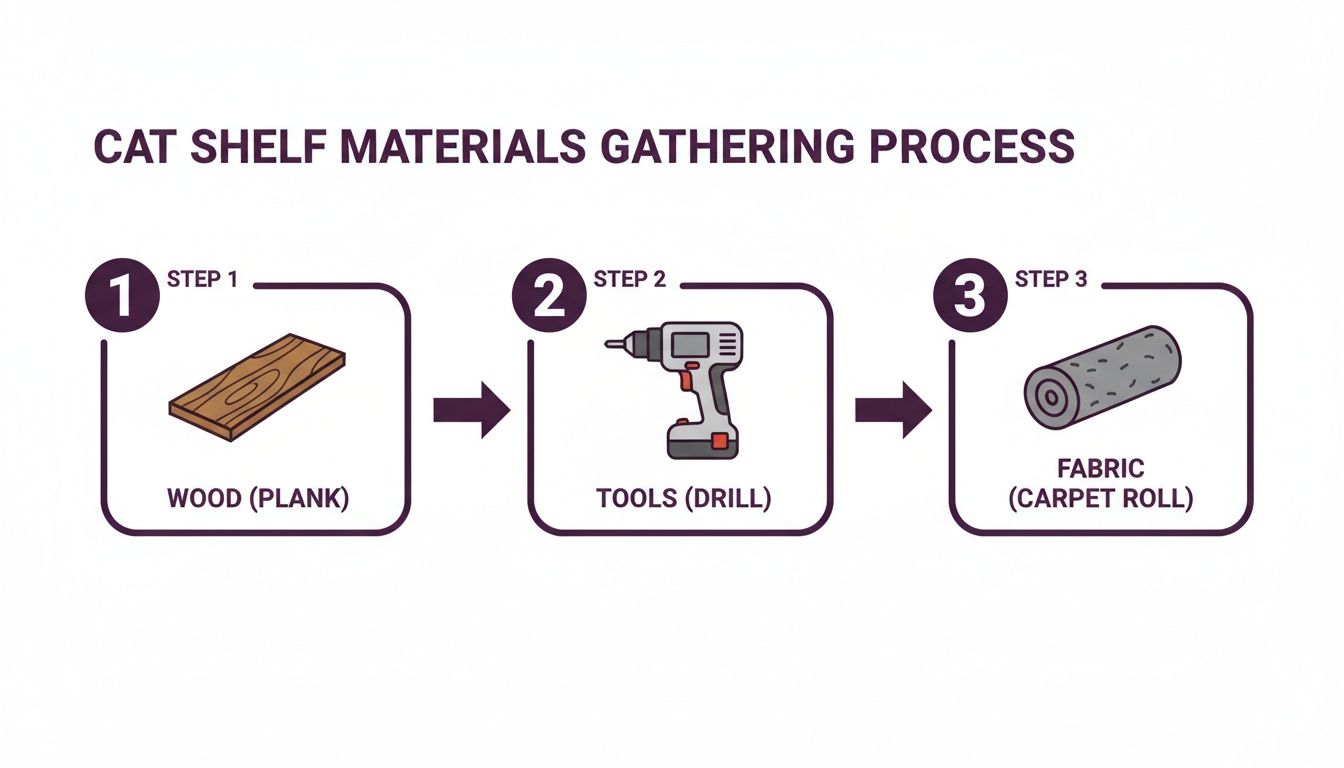
Think of it like this: every great cat shelf project rests on three pillars—the solid wood structure, the tools for putting it all together, and the cozy fabric that makes it irresistible. Let’s get building!
Project 1: The Simple Floating Perch (Beginner Friendly 😸)
This first project is the purr-fect starting point. It's a single, stylish shelf that gives your cat a prime spot for snoozing in the sun without taking over an entire wall. Think of it as their personal VIP sunbathing deck.
What You'll Need:
- One solid wood board (pine is a great choice!), about 1x10 inches and cut to 18-24 inches long.
- Two heavy-duty L-brackets with the right screws for your wall type.
- Sandpaper (both medium and fine grit).
- A piece of carpet remnant or faux fur, just a bit larger than your board.
- A heavy-duty staple gun and plenty of staples.
First things first, sand that board until it's silky smooth. Pay special attention to the corners and edges—we want happy paws, not splinters! Once you're done, wipe it clean with a damp cloth to get rid of any dust.
Next, lay your cozy fabric face down and place the sanded board on top. Wrap the fabric snugly around the board and use your staple gun to fasten it to the underside. Pull it tight as you go for a neat, professional-looking finish. Just like that, you have a comfy, non-slip surface ready for some serious lounging.
Project 2: The Tiered Cat Climb (Intermediate Adventurer 😼)
Ready for a bit more action? The Tiered Cat Climb creates an exciting, staggered path that encourages jumping, playing, and exploring. It’s a fantastic way to connect a favorite window to the top of a bookshelf, creating a true cat highway.
For this design, you'll obviously need more than one shelf. A good starting point is three boards, all the same size as the beginner perch. The absolute key here is planning the layout. Before you even think about drilling a hole, grab some painter's tape and mark out the shelf locations on your wall.
Floofie’s Tip: "Get a sense of your cat’s typical leap! A comfortable vertical jump is around 12-16 inches, while a horizontal one can be 12-18 inches. You want to space your shelves so your cat can move between them confidently, not like they're attempting an Olympic long jump!"
When you're mapping out the layout, it helps to think about how it will fit into the bigger picture. For some great insights into making pieces that are both functional and beautiful, check out this guide on designing and building custom furniture.
Once your layout is taped out, prep each shelf just like you did for the Simple Floating Perch: sand it, cover it, and staple it. The real skill in this project comes down to making sure each shelf is perfectly level and securely mounted, which we'll cover in detail in the next section. For now, just focus on creating a series of beautiful, identical perches ready for installation.
Project 3: The Corner Lookout Lounge (Advanced DIY Pro 👑)
For those who want to build the ultimate feline throne, the Corner Lookout Lounge is the absolute peak of cat wall furniture. This project makes brilliant use of an often-wasted corner space, turning it into a spacious, secure nook where your cat can survey their domain.
This design is a bit more involved because it requires cutting a board to fit perfectly into a 90-degree corner.
Here’s the game plan:
- Make a Template: Start by making a template of your corner using a piece of cardboard. Walls aren't always a perfect 90 degrees, so this little trick ensures a snug, gap-free fit.
- Cut the Wood: Trace your cardboard template onto a larger piece of wood. A 24x24 inch piece of cabinet-grade plywood works wonderfully here. Use a jigsaw to carefully cut out the shape.
- Add Support Cleats: Because this shelf is larger, it needs more than just L-brackets. You'll want to install a wooden cleat on each wall right under where the shelf will sit. A cleat is just a simple strip of wood (like a 1x2) screwed directly into the wall studs for rock-solid support.
- Finish and Cover: Sand your custom-cut shelf until it's super smooth. Then, cover it with a plush, durable material. Faux fur or a thick, low-pile carpet remnant will transform this lookout into a five-star luxury bed.
This project is a fantastic way to stretch your DIY muscles. And if you really get the building bug and want to tackle even more amazing structures, you’ll find tons of inspiration in our guide to building a DIY cat condo.
No matter which design you choose, the process of how to make cat wall shelves is incredibly rewarding. You're not just building furniture; you're creating a space that enriches your cat's life, builds their confidence, and provides endless opportunities for fun. Now, let’s get these amazing creations securely up on the wall
Securely Mounting Shelves for Maximum Zoomies
You’ve built some truly magnificent perches, and your cat is already eyeing them with a glint of mischief. Now for the most important part: making them unshakeable. A wobbly shelf is a cat’s worst nightmare and a major safety no-no, so we’re going to make these things rock-solid.
This part can seem a little intimidating, but trust me, it’s super straightforward once you know the secret. And that secret, my friend, is the humble wall stud.
The Magic of Finding Wall Studs
Think of wall studs as the strong, silent heroes of your home’s structure. These are the vertical wooden beams behind your drywall that provide the ultimate anchor point. Attaching your shelves directly to these studs is the difference between a secure cat highway and a feline disaster waiting to happen.
A high-quality electronic stud finder from FloofChonk is your new best friend for this task. Simply slide it across the wall, and it will beep or light up when it detects a stud. Mark the edges of each stud with a pencil so you know exactly where your mounting points are.
Floofie's Golden Rule: "Never, ever, EVER mount a cat shelf using only drywall anchors. They are not strong enough to handle a pouncing kitty! Studs are not optional; they are the law of the cat-shelf land." 😼
Drilling and Anchoring for Purr-fect Stability
Once you've marked your studs, it’s time to drill. A common mistake is trying to force a screw directly into the wall. This can split the wood stud or damage your drywall. Instead, you need to drill a pilot hole.
A pilot hole is just a small hole you drill first that’s slightly narrower than your screw. This gives the screw a clear path, ensuring a tight, secure fit without any damage. Use a drill bit that’s a little smaller than the diameter of your screw shank.
But what if a stud isn't exactly where you need it for your perfect design? Don't panic! While aiming for studs is always the top priority, you can use a high-quality toggle bolt or molly bolt for secondary support if absolutely necessary. These anchors expand behind the drywall to create a much stronger hold than a standard plastic anchor.
Here’s a quick rundown of your best options when a stud just isn't cooperating.
Wall Anchors Demystified: What to Use and When
| Anchor Type | Best for Wall Type | Weight Capacity | Installation Notes |
|---|---|---|---|
| Toggle Bolt | Drywall, Plaster | High | Requires a large pilot hole. The "wings" spring open behind the wall. |
| Molly Bolt | Drywall, Plaster | Medium to High | Creates a permanent, threaded anchor. Great if you might remove the shelf later. |
| Self-Drilling Anchor | Drywall | Low to Medium | Easy to install, but best for lighter loads or secondary support points only. |
| Lag Screw (into stud) | Any (into wood stud) | Very High | The gold standard. Drills directly into the structural support of your wall. |
Ultimately, using the right hardware for your specific wall type is non-negotiable for a safe and sturdy cat highway.
Getting It All on the Wall
With your pilot holes drilled, the assembly line can begin. First, attach the brackets to the underside of your beautifully crafted shelf. Make sure they are evenly spaced and perfectly straight.
Next, hold the shelf up to the wall, aligning the bracket holes with your pilot holes in the studs. Use a level to ensure your shelf isn't crooked—nobody wants a tipsy takeoff or landing! A wonky shelf is a major design faux pas in Floofie's book.
With everything perfectly aligned, drive your screws through the brackets and into the wall studs. You’ll feel them bite into the wood, creating that super-strong connection you need. Keep going until the screw is snug, but don’t overtighten and strip the wood. To truly maximize zoomies safely, it’s paramount to follow easy tips for safely securing furniture to walls, preventing any potential tip-overs.
This focus on creating secure, enriching environments for our pets is part of a massive trend. North America currently dominates the cat furniture market, holding a 34.5% share valued at about USD 0.45 billion. This is driven by devoted pet parents who invest in their cat's comfort and happiness. Discover more insights about the booming cat furniture market on verifiedmarketresearch.com.
The All-Important Wiggle Test
You’ve done it! The shelf is on the wall. But before you let your feline friend start their parkour routine, it’s time for Floofie’s patented “Wiggle Test.”
Place your hands on the shelf and give it a good, firm wiggle. Try to move it up, down, and side-to-side. Does it feel like a solid part of the wall? Is there any give, creaking, or movement? If it’s rock-solid, you’ve passed with flying colors. 🥳
If you feel any movement at all, stop and reassess. Are your screws fully tightened? Are they securely in the center of the studs? It’s much better to fix a small issue now than to have a shelf fail later. Once it passes the test, stand back and admire your handiwork. You're now a certified mounting master, ready for the next step.
Integrating Your Catscape with Your Home Decor
You’ve built an amazing vertical kingdom for your cat, and they are officially impressed. But who says cat furniture can't be seriously chic? 💅 Let's make sure your new project looks less like a random addition and more like a stunning, intentional piece of your interior design.
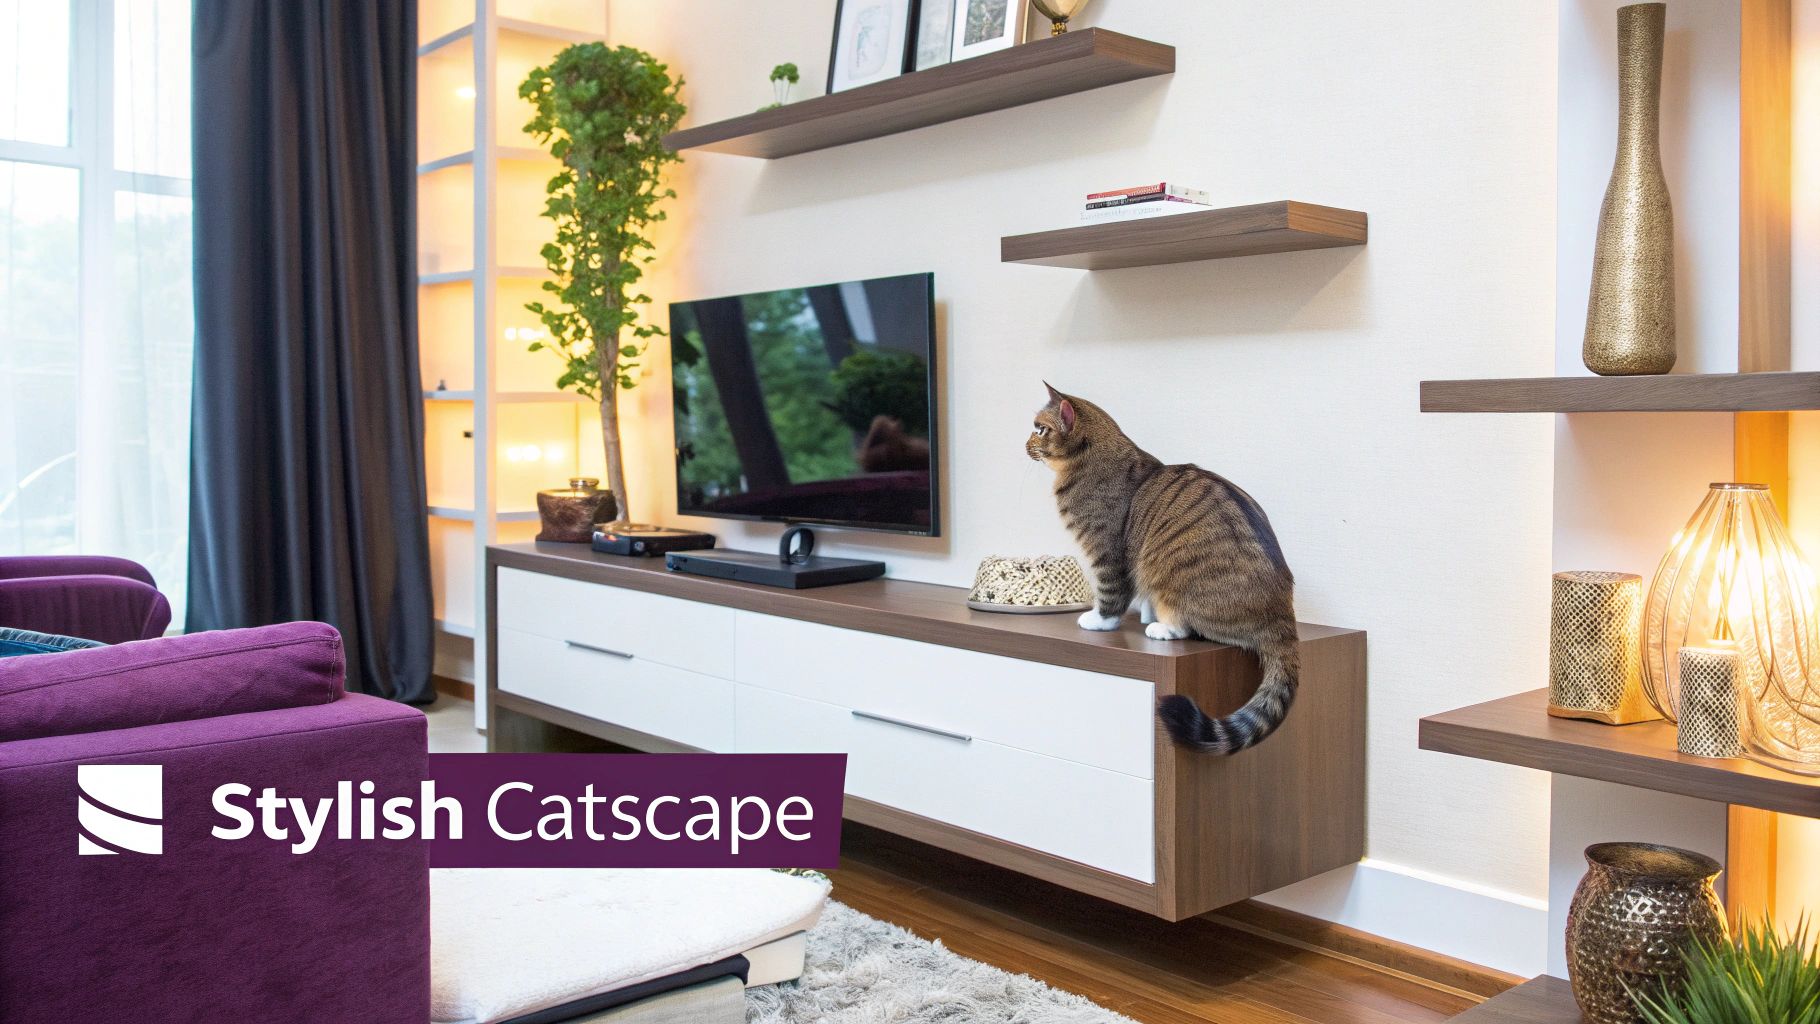
This part is all about aesthetics. The goal is to blend your catscape so seamlessly that guests say, "Wow, cool shelves!" before they even realize it's a feline superhighway.
Harmonizing with Your Home's Palette
The easiest way to make your new shelves feel like they belong is by matching them to your existing decor. This simple move creates a cohesive look that feels deliberate and high-end.
Take a look at your current color scheme and furniture:
- Matchy-Matchy Magic: Use a non-toxic, pet-safe paint or stain on the shelves to match your coffee table, media console, or bookcases. This creates a beautifully unified look.
- Go Bold: Feeling adventurous? Paint the shelves a vibrant accent color that pops against your wall. This turns the entire catscape into a fun, functional piece of wall art.
- Natural and Neutral: For a minimalist or Scandinavian vibe, just leave the wood natural (after a good sanding, of course!) or apply a clear, cat-safe sealant. This highlights the wood's beauty and adds a touch of organic warmth.
Floofie’s Decor Tip: "My human stained my shelves to match our dark wood bookcase. Now I look extra sophisticated when I’m plotting world domination from up high. It’s all about the brand, you know." 🧐
Creating a Strategic and Stylish Flow
Placement is everything. A well-designed cat highway should have a natural, logical flow that makes sense to both your cat and the human eye. Don't just stick shelves on a wall randomly; think about the path you're creating from their perspective.
The real key is to connect the high points your cat already loves. A great catscape often acts as a bridge, linking a sunny window to the top of a tall armoire or a sturdy bookcase. This makes the shelves feel like part of a larger, integrated system they'll actually use.
Level Up with Feline Furnishings
Your shelves are the foundation, but the right accessories are what turn a simple perch into a true feline paradise. Think beyond just the wood and create an entire enrichment zone on your wall. This not only makes the space more exciting for your cat but also looks more complete from a design perspective.
Purr-fect Pairings for Your Shelves:
- Wall-Mounted Scratchers: Pop a sisal scratching panel or pole near an entry point to the shelf system. This encourages good scratching habits right where they need them most.
- Cozy Wall Beds: Add a plush, wall-mounted bed at the highest point of the climb. This becomes the ultimate destination for those epic, sun-soaked catnaps.
- Cat-Safe Greenery: As Floofie suggests, a little greenery completes the indoor jungle gym vibe! Place cat-safe plants like spider plants or rattlesnake plants on nearby surfaces—just make sure they are out of chomping reach if your cat is a known nibbler.
By combining different textures and elements, you create a space that's both visually interesting and highly functional. If you're looking for more ways to make your home a stylish haven for you and your kitty, check out our complete guide to chic and functional cat home decor. Let's make your home the talk of the cattery! ✨
Got Questions? We've Got Answers
Building something new for your cat always brings up a few last-minute questions. You're not alone! Here are the answers to the most common things people ask before they start drilling. Our head of quality control, Floofie, has heard them all and is here to set the record straight. 🧐
We’ll cover everything from picking the purr-fect materials to convincing a kitty who’s a little… skeptical.
What’s the Best Wood for Cat Wall Shelves?
Solid, untreated wood is your best bet, hands down. Think pine or spruce. These woods are strong, pretty affordable, and most importantly, non-toxic if your cat decides to do a little taste test. Another fantastic option is cabinet-grade plywood, which is super sturdy and resists warping over time.
What you definitely want to avoid is particleboard or MDF. They just can't handle the force of a cat launching itself from one spot to another, and they often contain glues you don't want your furry friend around.
Floofie’s Pro-Tip: "Whatever wood you pick, sand every single edge until it's silky smooth. My toe beans are very sensitive, and splinters are a major party foul!" 🐾
How Far Apart Should I Space the Cat Shelves?
This is a brilliant question, and the answer really depends on your cat's personal parkour skills. Their age, size, and agility level all come into play.
Here are some general guidelines to get you started:
- For young, springy cats: A horizontal distance of 12-18 inches and a vertical jump of 12-16 inches creates a fun, challenging path that keeps them engaged.
- For senior cats or less mobile kitties: Think more like a gentle staircase. Place shelves closer together, maybe 8-12 inches apart both horizontally and vertically. This ensures they can move between perches safely and with confidence.
Honestly, the best way to figure it out is just to watch your cat. See how high they comfortably hop onto a chair or your sofa. That’s your personal leap-o-meter right there!
How Can I Get My Cat to Actually Use the New Shelves?
Patience, my friend, is everything! Cats can be famously wary of new things in their territory. Your job is to make the shelves an offer they simply can't refuse. Whatever you do, never force your cat onto them—let them explore on their own timeline.
The real secret is to make the shelves absolutely irresistible. Try placing a few high-value treats on each level to lead them up the path. A little sprinkle of catnip or a favorite crinkle toy can also work wonders.
Another great trick is to use a wand toy, like the Floof-Feather Teaser from FloofChonk, and turn their first climb into an exciting game. Lead them from one shelf to the next, ending with a big reward at the very top. This helps them build a positive association with their new vertical world, turning caution into curiosity, and then into confidence. Before you know it, their new highway will be their favorite spot in the house. ✨
Ready to spoil your feline friend even more? Explore the entire collection of paw-approved toys, stylish apparel, and unique home decor at FloofChonk. From cozy beds to interactive gadgets, find everything you need to build the ultimate cat paradise at https://www.floofchonk.com