
Adjustable Ring Crochet: A Friendly Floofie Guide

Your hook is in one hand, your yarn is in the other, and there's that tiny moment of hesitation before the first stitch. The center hole from a chain start keeps showing up. Your circle looks fine from far away, but close up it has that little “whoops” opening right in the middle.
That's where adjustable ring crochet starts to feel less like a trick and more like a cozy hand ritual. Once your fingers learn it, they remember. You wrap, scoop, pull up a loop, make your first stitches, then cinch the center shut like a tidy little spell. Floofie would absolutely approve. 🐾☕
Meet Floofie and the Magic Ring
Floofie, our orange tabby mascot, would like it known that every crochet lesson should begin with tea on the table, yarn within paw range, and one dramatic attempt to sit directly on the pattern. That's the mood here. Soft light, calm hands, and no scolding if your first loop flops around like a sleepy kitten.
The star today is the adjustable ring, also called the magic ring or magic loop in many crochet spaces. In plain language, it's a starting loop that lets you crochet your first round and then pull the center closed. That neat little pull is why amigurumi makers love it so much. It gets rid of the center gap that often shows up with chain-start circles.
Historically, this technique has deeper roots than social media tutorials make it seem. The adjustable ring appears in early 20th-century Tunisian crochet literature, and its widespread use in amigurumi is dated to around 2006. One major marker came in 2008 with Modern Amigurumi Techniques by Noriko Nakamura, and one report says 78% of new English-language patterns included magic ring instructions within two years, rising to 94% by 2012 in that pattern market snapshot (historical look at adjustable ring adoption).
Why beginners stick with it: a closed center makes stuffed toys, tiny motifs, and decorative circles look cleaner right from stitch one.
If you've ever wanted to make round cat toys, little paws, or snug amigurumi faces, this is the starting move that makes them look polished. It's one of those small skills that opens up a whole basket of projects, including the kind of playful ideas you'll spot in cat toy inspiration for curious kitties.
And yes, the same tiny loop that feels mysterious now can absolutely become kitty ears later. Floofie has already decided so. 😸
Gathering Your Cozy Crochet Kit
Before your hands do the loop-de-loop, it helps to gather a simple little nest of tools. Adjustable ring crochet doesn't ask for much, which is one reason it's such a lovely skill to practice on the sofa, at a café, or by a sunny window with a cat supervising.
Start with easy-to-see materials
Pick a smooth, plied yarn in a light color. DK or worsted-weight yarn is beginner-friendly because the strands are easier to see, and a lighter shade lets you spot where the tail, working yarn, and loop all sit. If you can choose between a fuzzy yarn and a smooth cotton-blend or acrylic, go smooth first. Your future self will purr with relief.
A hook that matches your yarn label is perfect. Many beginners feel comfortable in the 3.5 mm to 5 mm range for this technique, because the stitches are easy to control without feeling tiny or cramped.
A small kit that saves big frustration
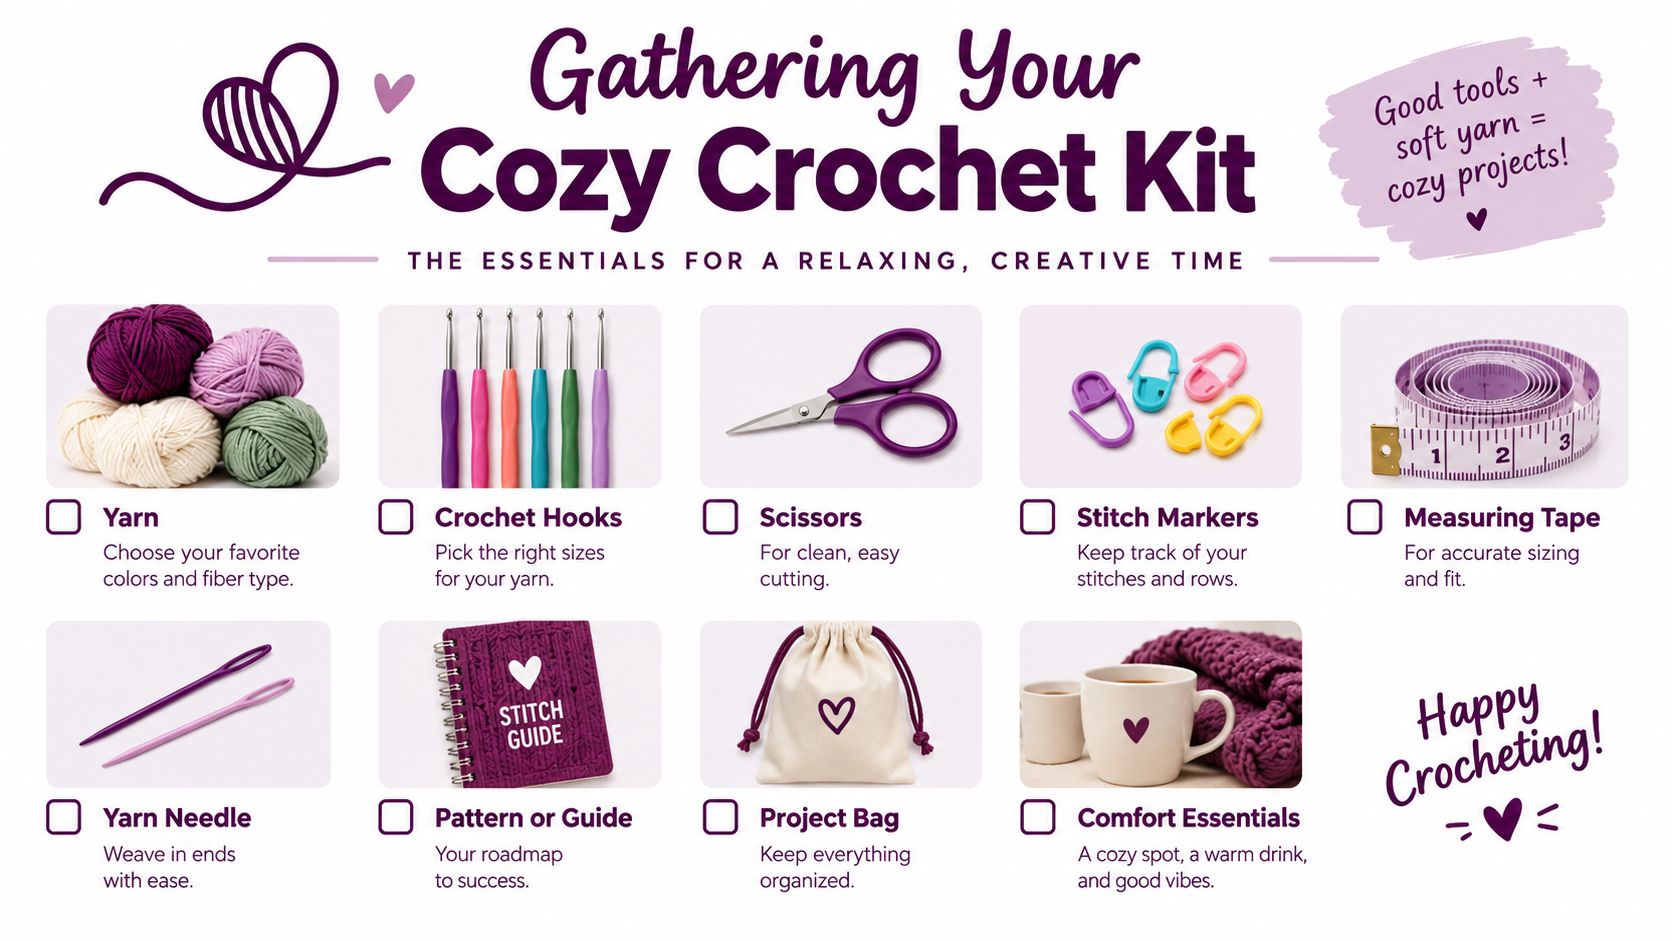
Here's the cozy checklist I'd set beside my tea mug:
- Yarn you can read: Smooth DK or worsted yarn in a pale shade helps you see the crossing strands clearly.
- A comfortable hook: Bamboo-handled or soft-grip hooks can feel gentler if your hands tense up.
- Sharp scissors: You want a clean snip, especially when trimming tails for neat finishing.
- A blunt-tip tapestry needle: This is what you'll use to weave in the tail after the ring is fully tightened.
- Two stitch markers: They help bracket round one so the start and end don't wander off like mischievous kittens.
- A notions bowl: Hooks and markers love to roll under furniture. The bowl is your anti-chaos dish.
- A notebook: Jot down hook size, yarn, and whether your circle felt too loose or too snug.
Keep your first practice session boring on purpose. Plain yarn and one hook size make it easier to learn the hand motion without extra tangles.
This whole setup is delightfully portable. It tucks into a tote, waits patiently in a project pouch, and doesn't demand a giant craft room to work its tiny magic.
Wrapping the Ring Stitch by Stitch
The first time you try adjustable ring crochet, it can feel like you're holding three different pieces of yarn that all look suspiciously identical. That's normal. Your fingers are learning a sequence, not taking a test. 🧶
How the loop sits in your hand
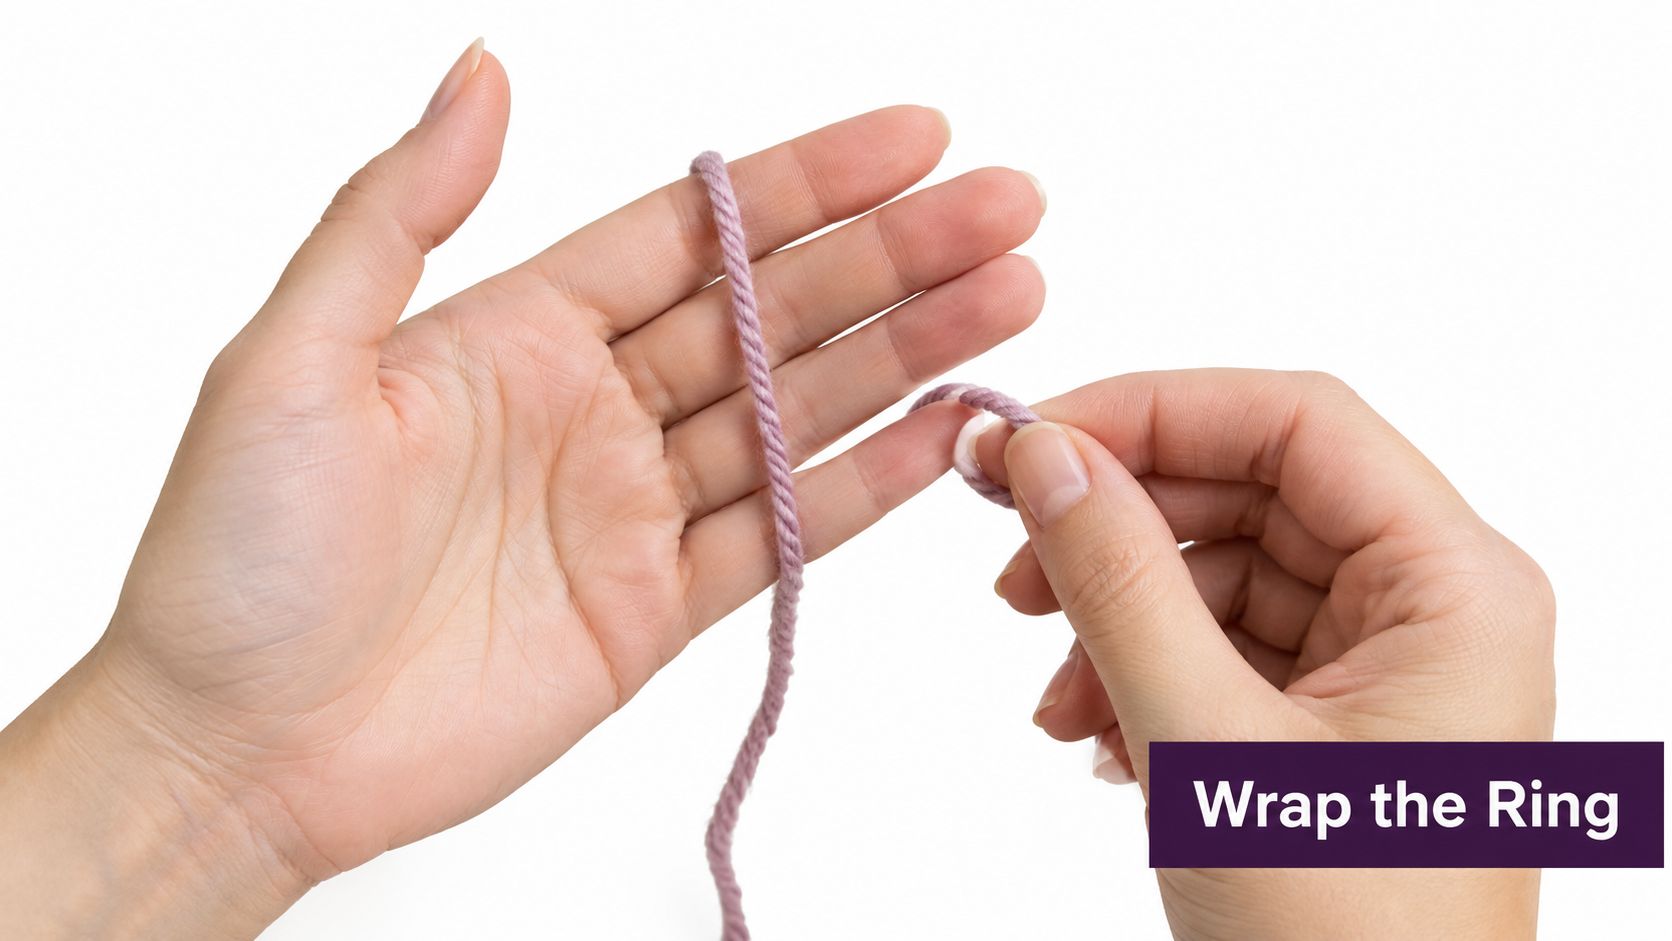
Lay the yarn tail across your palm so the short end hangs toward your wrist and the working yarn leads back to the ball. Wrap the yarn across your fingers, then around so a loop forms and the strands cross neatly on your palm. You don't need a strangled, tight loop. Relaxed is better. A gentle wrap gives your hook room to move.
Pinch the place where the yarn crosses with your thumb and middle finger. That pinch matters. It keeps the ring from twisting while you work into it.
Several tutorials converge on the same basic sequence: wrap the yarn around two fingers, insert the hook under the ring, draw up a loop, make a chain-1 to secure it, work the first round into the ring, then pull the tail to close it. For amigurumi, a common start is 6 single crochet stitches in that ring (adjustable ring tutorial sequence).
What your hook is actually doing
Slide your hook under the loop from front to back and catch the working yarn. Pull up a loop through the center. At this point, the yarn may whisper and hiss a bit off the skein, and the hook may give a tiny click as it catches both strands. That little sensory feedback is useful. It tells you the motion is working.
Make your securing chain. If you're starting with single crochet, that's often a chain-1. If you're using taller stitches, the starting chain may be taller too. Then begin working your first round directly around the ring.
The stitches should hug the outside of the yarn circle. You are crocheting over the ring, not into an empty hole by itself.
As you build the round, keep the tail visible and reachable. Don't bury it in a death grip. It needs to stay free enough to pull later.
The tiny details that prevent wobble
The fussiest part is yarn placement. Tutorials keep returning to the same warnings: cross the working yarn and tail correctly, insert the hook under both strands, and leave a long enough tail to tighten and weave in. A 4-inch or longer tail is commonly recommended because a too-short tail can make the ring unstable or harder to finish neatly (common adjustable ring pitfalls).
A second useful mechanic shows up in many pattern starts: make the first round with the stitch count your pattern wants, then tighten. One tutorial notes that many patterns use 6 single crochet stitches, while another emphasizes continuing until the pattern's required count is reached before cinching the ring (first-round stitch count guidance).
If your first attempt looks lumpy, don't panic-paws. That doesn't mean you've “done crochet wrong.” It usually means your pinch loosened, your stitches crowded one side, or your loop was tighter than needed. Try again with a softer wrap and slower hands.
Closing the Center and Checking Your Gauge
This is the satisfying part. The ring stops looking like a floppy loop and becomes a clean little circle with a closed center. Tiny yarn sorcery, very Floofie-approved. ✨
To get that result, pull the short yarn tail, not the working yarn attached to the ball. Multiple tutorials emphasize this because the tail is what shrinks the outer loop and closes the hole without undoing the stitches you just made (how to tighten the ring correctly).
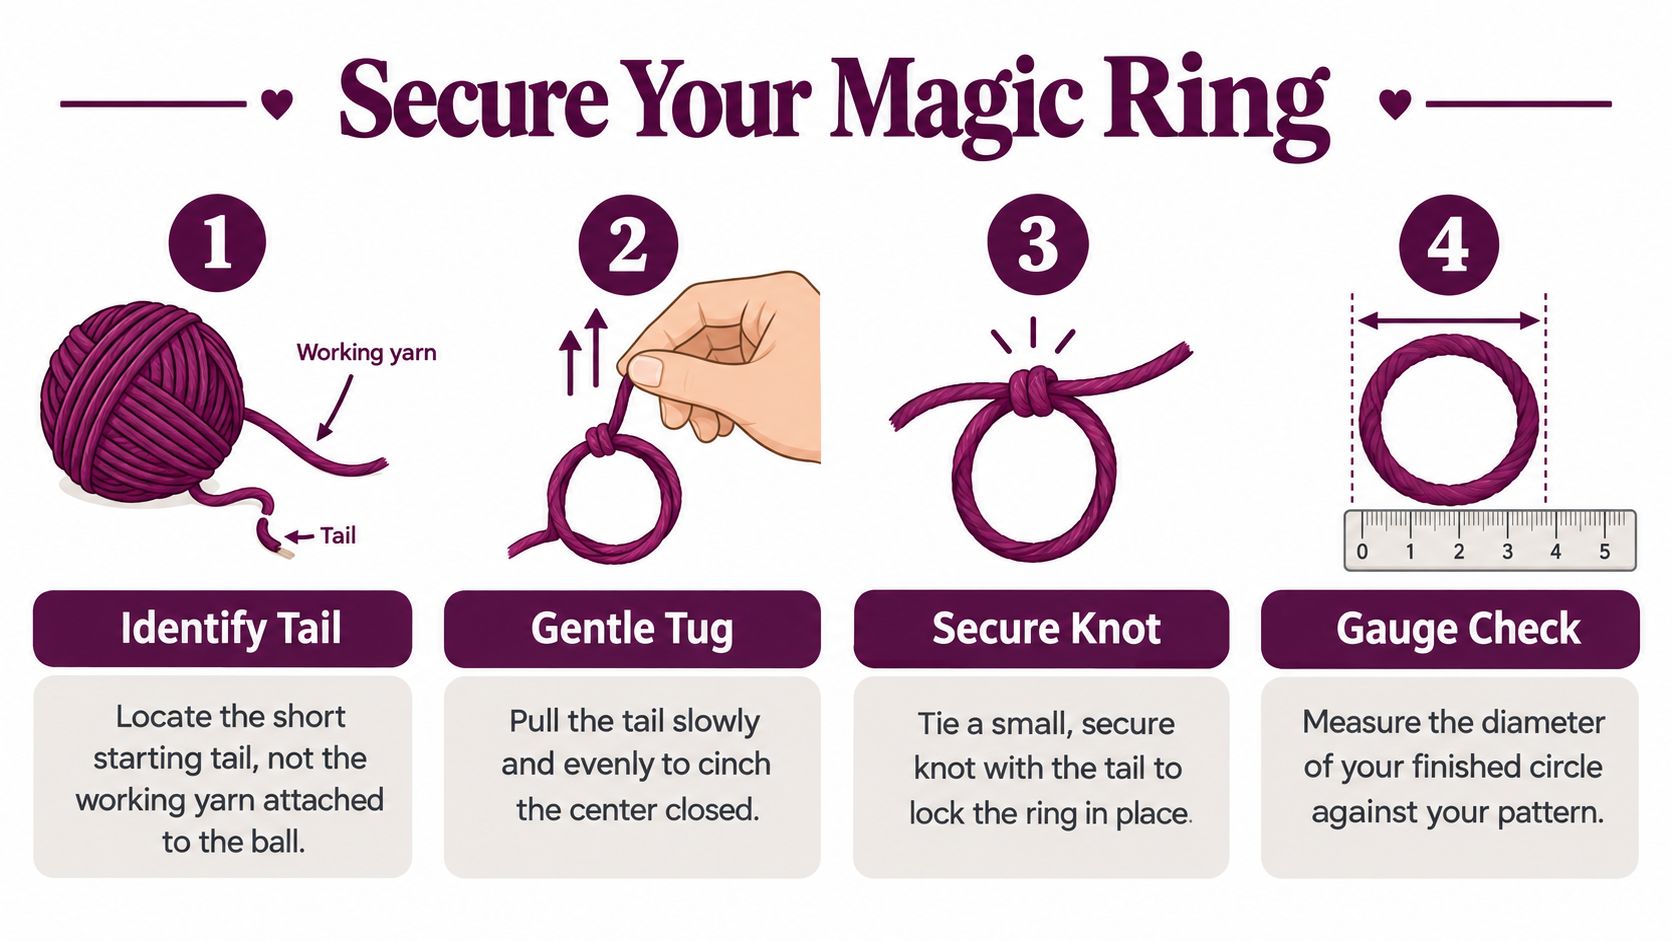
Pinch the wrong side of the round with your thumb, give the tail a steady tug, and watch the center shrink. If the stitches bunch up, wiggle them gently around the ring before the final pull so the circle settles evenly.
A quick visual demo helps here:
A simple way to think about gauge
Gauge sounds fancy, but it just means how dense your stitches come out with a particular yarn and hook. For round starts, three things shape the finished size: stitch count, hook size, and yarn weight. If your circle looks too floppy, your hook may be too large for that yarn. If it cups up, your stitches may be too tight.
A practical way to check yourself is to make a small swatch and note whether your stitches sit flat and even.
| Starting round | Common use |
|---|---|
| 6 stitches | Small amigurumi starts, tight little spheres, paws |
| 8 stitches | Slightly broader circles, soft motifs |
| 10 stitches | Wider decorative centers |
| 12 stitches | Larger open rounds, some motifs and medallions |
Practical rule: If the center closes neatly and the first round lies flat, you're in a good place before you build ears, tails, or tiny cat faces on top of it.
When the Ring Refuses to Behave
Some crochet tutorials act like the adjustable ring either works instantly or you've somehow offended the yarn gods. Real life is messier. The more useful question isn't “Can you make one?” It's “What do you do when it gets weird?”
A recent tutorial points to a trouble spot many beginners eventually hit: once the ring holds 10+ stitches, it can become harder to pull completely shut, and a double magic ring is sometimes recommended for a more secure closure (failure modes and high-stitch-count issues). That matters because simple amigurumi starts are one thing, but mandalas, doilies, and larger motifs ask more from the loop.
Three common problems and what usually fixes them
- It won't close: The tail may be too short, or the stitches may be bunched hard on one side. Try loosening the round with your fingertips, nudging the stitches around the ring so they distribute more evenly, then pull the tail again.
- It pops open later: Usually the tail got trapped awkwardly inside the stitches, or the first round stayed too loose. Thread the tail onto a tapestry needle and sew it firmly through the center and back through nearby stitches to anchor it.
- The center stays uneven: Sometimes the loop closes, but the stitches settle in a lopsided little donut. In that case, some crocheters prefer a chain-and-join start for that project, especially if they want a more predictable opening with taller stitches.
Picking the right start for the project
There's still not much clear, data-backed comparison between the adjustable ring and older chain-based starts. Tutorials often treat them like interchangeable names rather than different choices with different tradeoffs. What does come through clearly is that many crocheters value the adjustable ring for eliminating the center gap, while newer guidance leans toward more specialized starts such as the double magic ring for larger first rounds (discussion of tradeoffs and specialized starts).
If your ring keeps fighting you on a larger motif, that doesn't mean you've failed. It means the project may want a different opening method. Very cat-like, really. Same species, different temperament. 😹
Purr-fect Cat-Themed Variations to Try
Once your hands know the ritual, practice gets more fun when it turns into something giftable. A tiny ring is much more charming when it's clearly becoming a cat-ish treasure instead of “a random circle I made while squinting.” That's where Floofie energy really shines.
Tiny projects with big personality
A paw pad coaster is a sweet first variation. Start with a small adjustable ring and build a compact circle in soft cotton. Add tiny accent bumps or embroidered pads and you've got a tea-time coaster that feels handmade in the best way.
A kitten tail pom-pom keychain gives the ring a different job. Here, the ring becomes the tidy base for a narrow stuffed tube that curls a bit. Plush yarn makes it extra cuddly, and the finished piece works as a bag charm or gift topper for a fellow cat person.
A mouse-shaped amigurumi head is especially cute if you want an immediate “oh, I made a thing” payoff. The ring forms the rounded snout area, and a pair of simple ear loops turns the little shape into a recognizable critter.
Match colors to a real cat's markings for a keepsake that feels personal. Tuxedo black, sandy tabby, cloud gray, and peachy ginger all work beautifully.
A few styling ideas for display and gifting
If you're making homey cat-themed crochet gifts, it can be lovely to pair them with visual inspiration from a room you're decorating. If you want ideas for a cat-loving corner, you can find animal wall art online and build a cozy little theme around your handmade piece.
For more playful project prompts, especially if your crochet is destined for a real whiskered chaos goblin, these DIY cat toy ideas can spark all sorts of yarny mischief. A small crochet mouse beside a toy basket is very hard to resist.
Send-Off and Next Yarn Adventure
That little loop at the beginning doesn't look like much. Then your hands learn the motion, the center pulls closed, and suddenly adjustable ring crochet feels familiar instead of mysterious. That's a lovely shift.
You now have a starting method that gives you a snug center, a cleaner first round, and a stronger-looking base for round projects. Those are small wins, but they change the whole mood of amigurumi and tiny motifs. The first stitch stops feeling awkward. It starts feeling intentional.
Three cozy next moves
- Try cat ears on a coaster: Make a round base, then add two tiny triangles at the top for a playful kitty silhouette.
- Turn the ring into a toy mouse: A compact round start makes a cute beginning for a tiny stuffed cat toy.
- Begin an amigurumi kitten head: Once you trust the ring, the crown of a little stuffed cat becomes much less intimidating.
If you like making your home as cat-happy as your craft basket, these DIY cardboard cat furniture ideas are a delightfully scrappy next rabbit hole. Crochet and cardboard are both excellent ways to spoil a household feline without turning your living room into a pet-store aisle.
Keep a hook and a scrap of yarn nearby. A ring made during a quiet moment on the sofa, in a waiting room, or beside a napping cat counts as practice. Those tiny repetitions are how the ritual settles into your fingers until it feels as natural as tying a bow or buttoning a sleeve.
Floofie would probably still sit on your yarn. But your stitches? They'll know exactly where to begin. 🐾
FloofChonk is full of cat-loving finds that pair perfectly with a crafty life, from playful home décor to gifts that celebrate your favorite whiskered muse. If this adjustable ring crochet guide has you dreaming up paw coasters, toy mice, or a whole kitten-themed craft corner, take a peek at FloofChonk for more feline-inspired fun.