A Purr-fectly Fun Project: Your DIY Cardboard Cat Tower

Hello, fellow cat servants! 😼 If you've ever looked at a pile of delivery boxes and thought, "I could build something amazing for my overlord with that," you're in the right place. A DIY cardboard cat tower is one of the best projects for creating a personalized playground that taps into your cat’s deepest instincts for climbing, scratching, and hiding.
This is more than just a way to save a few bucks; it's your chance to craft something special that your cat will actually use. Let's grab some boxes and get ready to build something truly meow-nificent. 🐾
Your Cat’s Cardboard Kingdom Awaits
Ready to build the ultimate cardboard castle for your feline ruler? Our resident cat-in-chief, Floofie, is already purring with anticipation for you. Turning a stack of simple boxes into a sturdy, eco-friendly palace is a fantastic weekend project that channels your cat's wild side into something fun and constructive.
This isn't just about another cat toy. It's about giving them some much-needed mental and physical enrichment. A well-designed tower encourages climbing, pouncing, and scratching on appropriate surfaces—not your new sofa! It's a creative outlet for you and a stimulating environment for them.
Honestly, one of the most rewarding parts is seeing your cat proudly survey their domain from a fortress you built with your own two hands. Floofie calls it "peak purr-fection"!
Why Your Cat Needs a Cardboard Kingdom
The idea of a DIY cardboard cat tower has really taken off, and it's easy to see why. So many of us share our homes with feline friends—in fact, households in the United States alone are home to over 94 million cats. That’s a staggering number of furry companions who all need a place to play and feel secure. You can learn more about the growing demand for cat products in this detailed industry report.
Building your own tower has some serious perks over buying one. Floofie insisted we make this chart to show you the key benefits of building a DIY cardboard cat tower for your furry friend.
| Benefit | Why It Matters for Your Cat 😺 |
|---|---|
| Eco-Friendly Fun | You're upcycling materials that would otherwise be trashed. It’s a green choice for the planet and a new playground for them. A win-win! |
| Custom-Fit for Your Cat | Is your cat a climber, a hider, or a lounger? You can design the tower to perfectly match their purr-sonality, size, and habits. |
| Budget-Friendly | The main material—cardboard—is usually free! This leaves more room in your budget for fun extras like the toys and accessories at FloofChonk. |
A DIY cardboard cat tower is a project filled with love, creativity, and a whole lot of tape. You aren’t just building a structure; you’re building a kingdom where your cat can reign supreme.
Gathering Your Royal Building Supplies
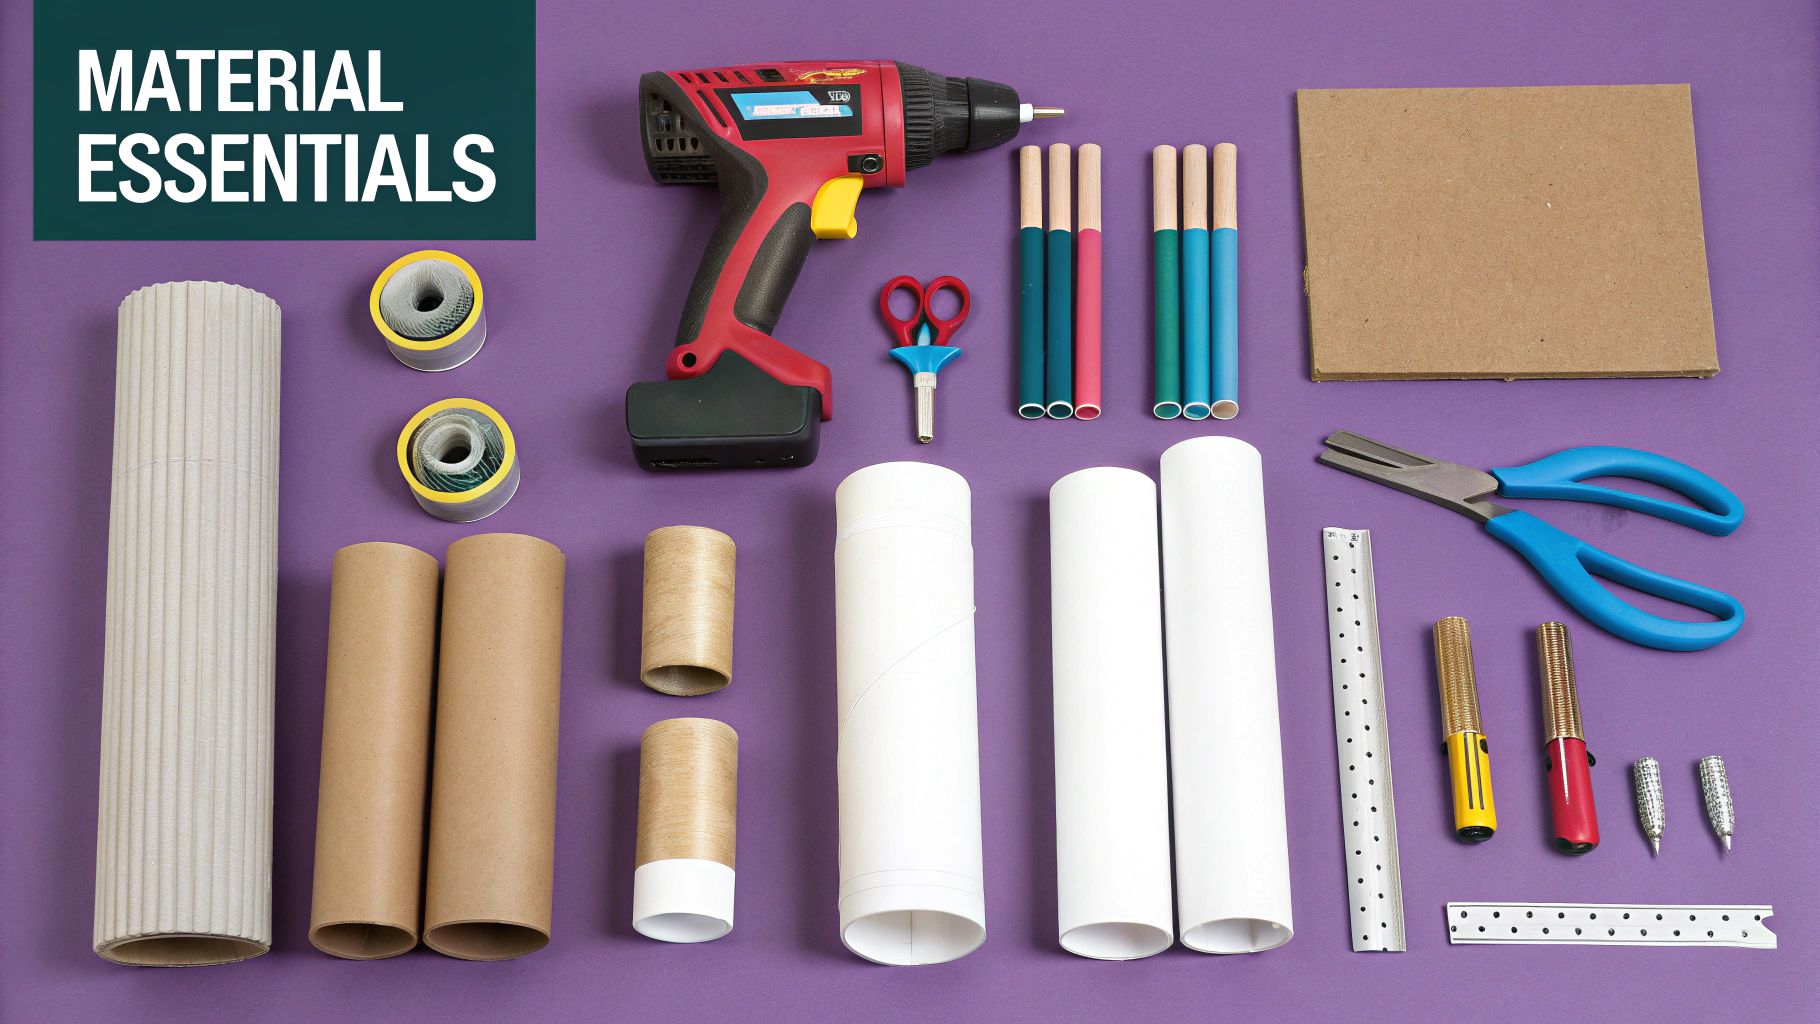
Before you can build your kitty’s cardboard kingdom, you need to gather your construction materials. Our mascot and chief project inspector, Floofie, has given his paw of approval to this checklist. After all, a DIY cardboard cat tower is only as mighty as the boxes it’s built from! 🛠️
First things first, you’ll need cardboard—and lots of it. But not just any old cardboard will do! We're talking about the strong stuff here. You'll want to aim for double-walled or even triple-walled corrugated cardboard. This is the heavy-duty material used for moving boxes, appliance packaging, or big shipments. Those flimsy cereal boxes just won't stand up to your cat’s inevitable zoomies.
Floofie’s Top Tip: The best boxes are often free! I always check with local furniture stores, appliance shops, or even grocery stores. They frequently have high-quality boxes they’re happy to give away. You just have to ask! Tell them Floofie sent you. 😉
Your Feline-Approved Crafting Kit
Once you've got your cardboard, it’s time to assemble the rest of your tools. A sharp blade is absolutely crucial for getting those clean, safe cuts that will fit together purr-fectly.
Here’s what you’ll need to have on paw:
- A Sturdy Box Cutter: Make sure you have a reliable utility knife with plenty of fresh, sharp blades. A dull blade can tear the cardboard and, trust me, is way more dangerous to use.
- Non-Toxic Glue: Your cat will almost certainly chew on their new tower, so safety is a top priority. Standard white school glue like Elmer's is a great choice. For faster assembly, a hot glue gun works wonders—just be sure to peel off any of those stray glue strings when you're done.
- Measuring & Marking Tools: A simple measuring tape and a pencil are all you really need to plan your cuts and make sure all your tower levels are even.
With these basics, you're ready to start building. But why stop there? Let’s add a little flair! I always like to grab some natural sisal rope to create a built-in scratching post—a feature that can save your furniture from some serious claw-related damage. You could also get some cat-safe paint to add a splash of color. These little extras are what transform a simple box structure into a true palace. Floofie is already getting excited! 😻
Designing Your Cat’s Cardboard Skyscraper
Alright, it's time to put on your architect hat and design the high-rise of your cat's dreams! A truly great diy cardboard cat tower isn't just a stack of old boxes. It’s a masterpiece of feline engineering—sturdy enough for the most epic zoomies and cozy enough for a royal nap. Our chief inspector, Floofie, is standing by to review your blueprints! 🏰
First things first: you have to think like your cat. Is your furry overlord a daredevil who craves the highest perch in the room? Or are they more of a cautious ground-dweller who just wants a secure little hideout? Getting a read on their personality is the secret to creating a design they’ll actually use. You’re not just building a tower; you're crafting their personal paradise.

This whole trend of creating personalized pet spaces is really taking off. The global market for cat trees and scratchers, which includes awesome DIY projects like this one, was valued at around $681 million USD and is expected to climb even higher. It just goes to show how much we love spoiling our cats. You can dig into the fascinating market trends for cat enrichment products at Persistence Market Research.
Blueprinting For Purrfection
To get those creative juices flowing, let's look at a few design ideas. Think of these as a starting point—feel free to mix, match, and totally reinvent them to meet your kitty's royal demands. Floofie has personally tested these concepts.
- The Compact Cube: This one’s perfect for smaller apartments or for cats who live for a good hide-and-seek session. It's a sturdy, single-level fort with plenty of peek-a-boo windows and a flat roof for lounging.
- The Tri-Level Lookout: Got an aspiring climber on your hands? This multi-story design uses staggered platforms to encourage leaping and climbing, giving them the perfect vantage point to survey their kingdom.
- The Sprawling Villa: If you have more than one cat, this is your go-to. It connects multiple cubes or towers with bridges and tunnels, creating a cat playground that helps minimize turf wars and maximize the fun.
Building A Wobble-Free Wonder
No matter what design you land on, stability is absolutely non-negotiable. Floofie is pretty insistent that his structures don't wiggle, especially during a vigorous scratch session. The secret? A solid foundation and some smart construction tricks.
Floofie’s Pro Tip: Always start with a wide, heavy base. I suggest gluing two or three large pieces of double-walled cardboard together. It creates a super-sturdy foundation that keeps the whole tower from tipping over! It's the most impawtant step!
To build a really strong tower, you need to think beyond just glue. Using interlocking slots—where you cut slits in adjoining panels so they slide together—creates a much more rigid frame. It's kind of like building with LEGOs; the pieces connect to give it strength. For taller structures, triangular supports glued into the corners of each level add incredible reinforcement and stop it from swaying.
These techniques are what separate a flimsy box pile from a true cardboard skyscraper. If you're looking for even more ideas on building stable structures, you might love our guide on other types of DIY cardboard cat furniture. This whole project is about creating a safe, fun, and personalized space for your best fur-end. Let's make something they'll absolutely adore! ❤️
Let's Build This Thing! Step-by-Step Assembly
Alright, your blueprints are cat-approved and the supplies are all gathered. Time for the best part—turning that mountain of cardboard into a palace worthy of your furry overlord. Floofie is probably supervising from a sunny spot, so let's make this diy cardboard cat tower something special. 👑
This is the stage where being a little bit of a perfectionist really pays off. A professional-looking and, more importantly, a structurally sound tower comes down to how well you cut your pieces. Don't just start hacking away! The secret weapon here is the ‘score and snap’ technique. Grab your ruler and use the back of your utility knife blade to press a firm line where you want a fold. Then, just gently bend the cardboard along that scored line for a perfectly crisp, clean edge. It’s a game-changer.
When cutting all the way through a piece, a fresh, sharp blade is non-negotiable. A dull blade is a recipe for frustration and can easily slip, which is just plain dangerous. Always work on a self-healing mat or some scrap cardboard you don’t mind scarring. Instead of trying to power through in one cut, make several shallow passes. This gives you way more control and leaves you with much cleaner edges.
This little guide shows the basic flow of how we'll get this thing built. Floofie approves!
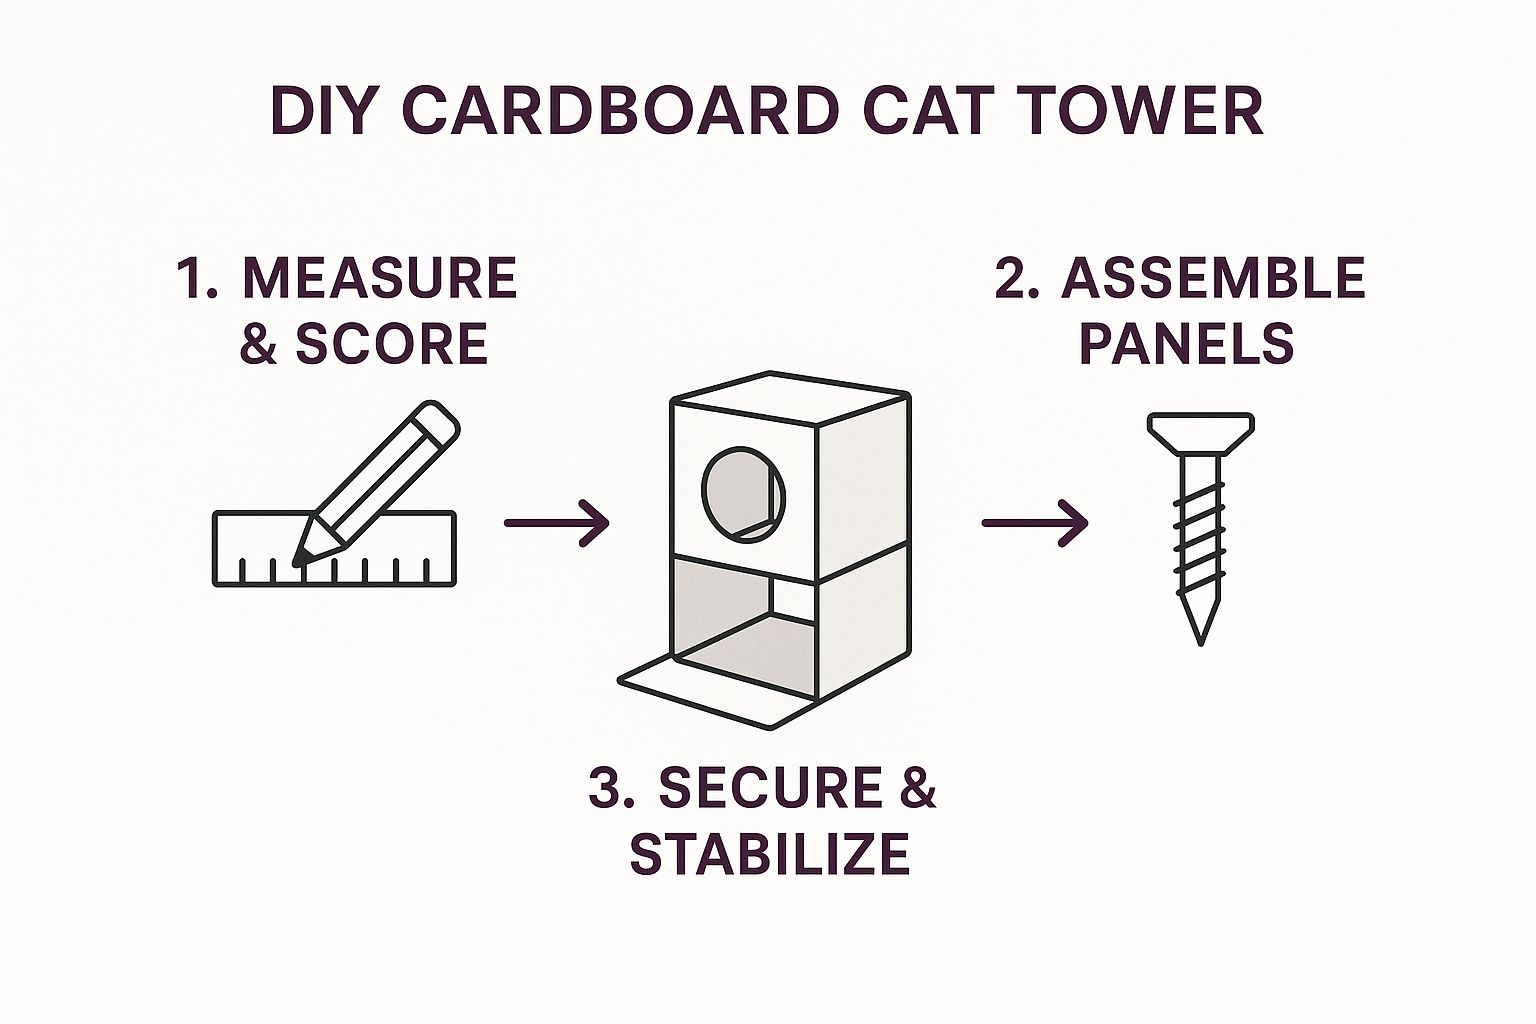
As you can see, it all starts with precise cuts, moves into careful building, and wraps up with making it extra tough.
Assembling Your Tower From the Ground Up
With a neat stack of perfectly cut pieces, you're ready to start building! The absolute golden rule here is to build from the base up. Get that first level assembled and make sure it's solid and square before you even think about adding the next floor. This is where your glue comes into play. We're big fans of a trusty hot glue gun for how quickly it sets, but you still need to be patient.
Floofie’s Official Wiggle Test: After gluing any two pieces together, hold them firmly in place for at least 30-60 seconds. Then, give it a gentle wiggle. If there's any movement, it needs more glue or more holding time. A tower isn't truly complete until every single joint passes the wiggle test!
For a truly unshakeable tower, glue is only part of the equation. Those interlocking tabs you designed are the real MVPs. As you connect walls and platforms, always slide the tabs into their matching slots before you add any glue. This creates a strong internal skeleton that helps distribute weight and pressure, making the whole structure much more resistant to your cat's wild acrobatics.
Reinforcing for Maximum Durability
To build a tower that can withstand years of zoomies, you'll want to add some hidden strength. This is a fantastic way to use up your cardboard scraps.
- Internal Support Beams: Tightly roll up scrap cardboard into dense little tubes. Cut them to fit and glue them vertically inside the corners of each level. Think of them as internal support columns—they add an incredible amount of strength for very little effort.
- Corner Reinforcement: Cut small cardboard triangles and glue them snugly into every interior corner where walls meet floors. It’s such a simple trick, but it dramatically cuts down on any potential wobbling.
- Let It Cure: This might be the most crucial tip of all. Once your tower is fully assembled, you have to let the glue cure completely for at least 24 hours before you unleash your cat on it. This gives the adhesive time to reach its maximum bond strength, ensuring the tower is safe and ready for action.
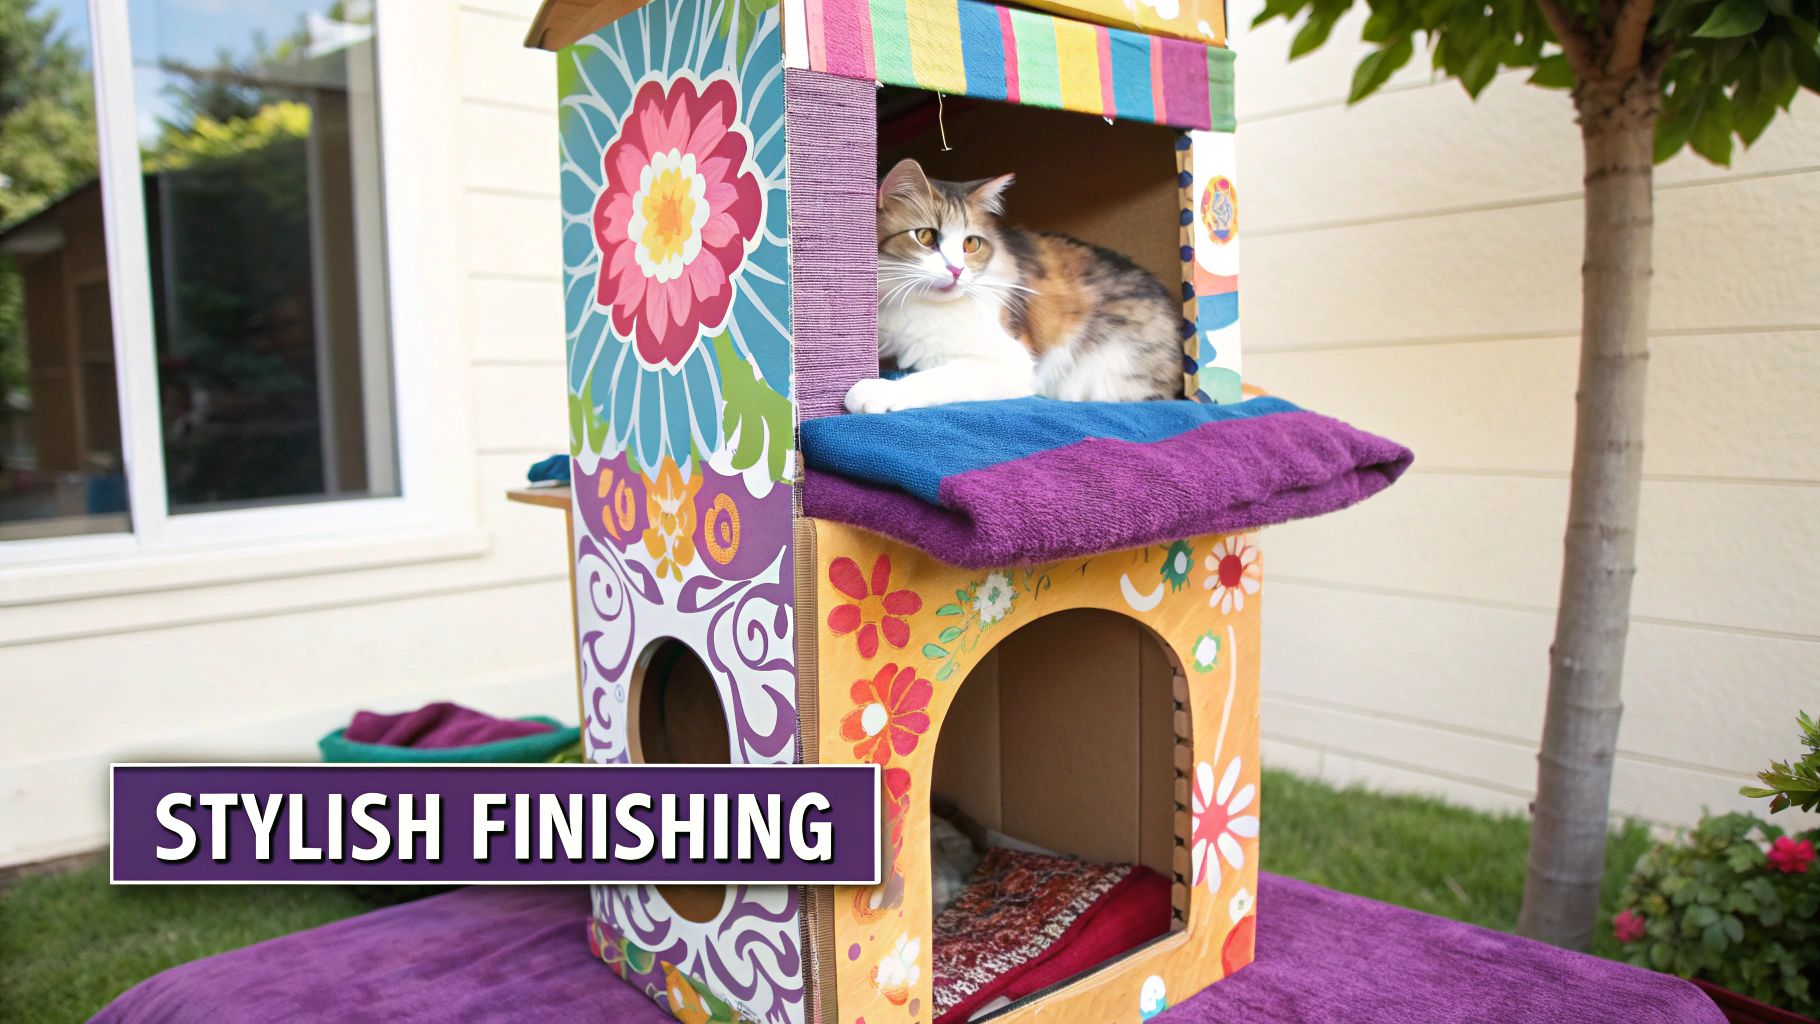
Putting on the Purr-fect Finishing Touches
Your cardboard cat tower is built and structurally sound, but let's be honest—it's not truly a kingdom without its royal decor! This is where the real fun begins. It's time for Floofie's favorite part: adding all the special features that will make your cat fall head over paws for their new fortress. 🎨
This is the step that transforms a simple cardboard structure into an irresistible, interactive playground. The details you add now are what will capture your cat's curiosity and encourage them to explore every single nook and cranny. Let's make it a place they never want to leave!
Create a Scratching Paradise
First things first, let's satisfy that deep, instinctual need to scratch. I’ve found that wrapping one or two of the main support pillars with durable sisal rope creates the perfect, built-in scratching surface. This simple addition can be a true furniture-saver!
To get it done, just secure one end of the rope at the very base of a pillar with a good dab of hot glue. Start wrapping the rope tightly, making sure there are absolutely no gaps. Every few inches, I like to add another dot of glue just to keep it extra secure. Once you reach the top, glue the end down firmly. Floofie gives this technique a double paw-up! 🐾
Pimp Your Cat’s Pad
Now for the creature comforts. A cozy nap spot is a non-negotiable for any discerning feline, and a few fun extras will turn this tower into a true home.
- Cozy Cubbies: Go ahead and line any enclosed boxes or nap perches with a soft fleece blanket or even an old t-shirt. Using something that already smells like you is a great trick to make the new tower feel familiar and safe right away.
- Peek-a-Boo Holes: Use a box cutter to create a few small, round holes (about 4-5 inches in diameter) in the walls of the different levels. These are perfect for those playful paw-swatting games and give your cat a sneaky vantage point to survey their domain.
- Dangling Delights: Time for toys! Securely attach a few dangly things, like feathers or bells, from the undersides of the platforms. Just be sure to use cat-safe materials like sturdy string or twine and attach them firmly so they can't be easily yanked off during an intense play session.
Floofie’s #1 Tip for Immediate Acceptance: A final, generous sprinkle of catnip on all the levels is the ultimate welcome wagon. Trust me, it’s the best way to encourage even the most skeptical kitty to start exploring their new digs.
Thinking of adding a splash of color? Go for it! But please, be absolutely certain you use non-toxic, water-based paints. If you need more inspiration on creating beautiful and safe things for your feline friend, check out our guide on the top eco-friendly cat-themed gifts. It’s packed with ideas that are both cat-approved and good for our planet. 🌍
Floofie's Favorite Tower Upgrades
Ready to take your creation to the next level? These optional add-ons can make your DIY tower even more appealing. Here are a few ideas that have been big hits in my house. Floofie has given each one his official rating.
| Upgrade Idea ✨ | What You'll Need | Cat Appeal Factor |
|---|---|---|
| Crinkle Tunnels | Brown paper bags or packing paper | Adds exciting sounds and textures for sensory play. Very mysterious! |
| Carpet Remnants | Small carpet squares, non-toxic glue | Provides a different scratching texture and a soft lounging spot. 10/10 for naps. |
| Treat Puzzles | Small cardboard tubes, scissors | Hide treats inside for a fun foraging challenge. Snack time! |
| Hammock Hideaway | A sturdy piece of fabric (fleece, canvas) | Creates a super-cozy, suspended spot for epic cat naps. The ultimate luxury! |
Choosing one or two of these can seriously increase the "wow" factor for your cat without much extra effort. It’s all about creating a space that’s as fun as it is functional.
Got Questions About Your Cardboard Cat Tower?
You've got questions, and our resident feline expert, Floofie, has the answers! Building a diy cardboard cat tower is a blast, but it's totally normal to have a few things you're wondering about before you start cutting and gluing.
We’ve pulled together some of the most common questions we get to help you build the purrfect cardboard paradise with total confidence. 🧐
How Can I Make My Tower Sturdy Enough for a Large Cat?
This is the big one, literally! If you have a larger cat (hello, fellow chonks!) or a particularly rambunctious kitten, stability is everything. You don't want their first pounce to end in a cardboard catastrophe.
The secret to a rock-solid tower starts with a wide, heavy base. I always recommend gluing several layers of double-walled cardboard together to create a solid foundation that simply won't tip over. For the main structure, using interlocking tabs that slot together provides way more strength than just glue alone. Think of it like building with LEGOs—it creates a rigid frame that can handle a lot more force.
Floofie’s Pro Tip for Big Kitties: Build in some internal support beams! Tightly roll up scrap cardboard into dense tubes and glue them inside the corners of each level. These act like internal columns and add incredible sturdiness, making sure your tower is ready for even the most epic zoomies.
Is It Safe if My Cat Chews on the Glue and Cardboard?
Safety first, always! 😻 It’s pretty much guaranteed that your cat will nibble, lick, or chew on their new playhouse, so you have to choose your materials wisely.
Stick to plain cardboard boxes—the kind without a lot of ink, shiny coatings, or leftover plastic tape. Most importantly, you absolutely must use non-toxic glue. A standard white school glue, like Elmer's Glue-All, is a fantastic choice because it's completely safe for pets once it has fully dried.
If you're using a hot glue gun for speed, be meticulous about peeling off all those thin, wispy glue "strings" after it cools. Your cat could easily swallow them, and we don't want that.
How Long Will a Cardboard Cat Tower Last?
The lifespan of your DIY creation really comes down to your cat's personality and just how much they love to scratch. A well-built tower can easily provide many months of fun and enrichment. The scratching surfaces will naturally be the first parts to show some wear and tear.
The great news is that maintenance is a breeze! You can just glue a new piece of cardboard over a worn-out spot or re-wrap a scratching pillar with fresh durable sisal rope. Easy peasy.
To clean your tower, a vacuum with a brush attachment is your best friend for getting rid of all that fur. For any little spills, just use a slightly damp cloth but try to avoid soaking the cardboard. Think of it as a fun, recyclable project you can refresh or rebuild whenever inspiration strikes! This kind of creative enrichment is a great supplement to their regular playtime. For more ways to keep your kitty engaged, you might be interested in our guide to the best pet toys for cats.
At FloofChonk, we're all about celebrating the special bond you share with your cat. From quirky apparel to innovative toys, we've got everything you need to spoil your favorite feline. Check out our collection at FloofChonk and find something pawsitively perfect.